Reach WebXR UI
Featured Case Study
I enabled the transition from native-only XR to browser-based immersive collaboration in an enterprise platform, improving task success rates from ~60% to near-universal completion through research-led iteration and performance-conscious design.
Enterprise WebXR Interface for Immersive Collaboration
Designing an immersive interface enabling browser-based XR collaboration and improving task success rates through research-driven iteration.
Business Context
- Native XR required installation and device-specific builds.
- WebXR version lacked immersive functionality.
- Enterprise teams faced friction in remote design reviews.
- Leadership and sales saw WebXR as strategic for scalability and demos.
Product Challenge
Design and validate a fully immersive WebXR interface that reduced onboarding friction, improved task reliability, and maintained performance across devices, while supporting enterprise scalability.
My Role
- Owned UX research and usability testing end-to-end.
- Designed information architecture and interaction system.
- Built functional WebXR prototypes for immersive validation.
- Led multiple product iterations informed by behavioral data
- Contributed directly to UI implementation to accelerate delivery.
Research-Driven Iteration
Task Completion
Improved from as low as 61% to 96–100% across core tasks.
Instruction Dependency
Reduced from 60–100+ seconds of guidance to under 12 seconds for most tasks.
User Perception
Shifted to “Very easy”, “Self-explanatory”, “Smooth”.
Key Decisions & Trade-Offs
- Prioritised performance over decorative 3D UI to ensure stability.
- Introduced structured onboarding and contextual tutorials to reduce cognitive load.
- Bridged design and engineering to shorten release cycles.
Outcome & Impact
- Enabled immersive WebXR sales demos.
- Reduced reliance on native installations.
- Expanded the product’s accessibility.
- Strengthened competitive positioning.
Demo Video
The video below shows the completed Reach WebXR UI and some of its contextual UX features such as the skippable onboarding sequence, the tooltips displayed on hover and the tutorials available in the HELP menu.
The Making Of
Design Concept
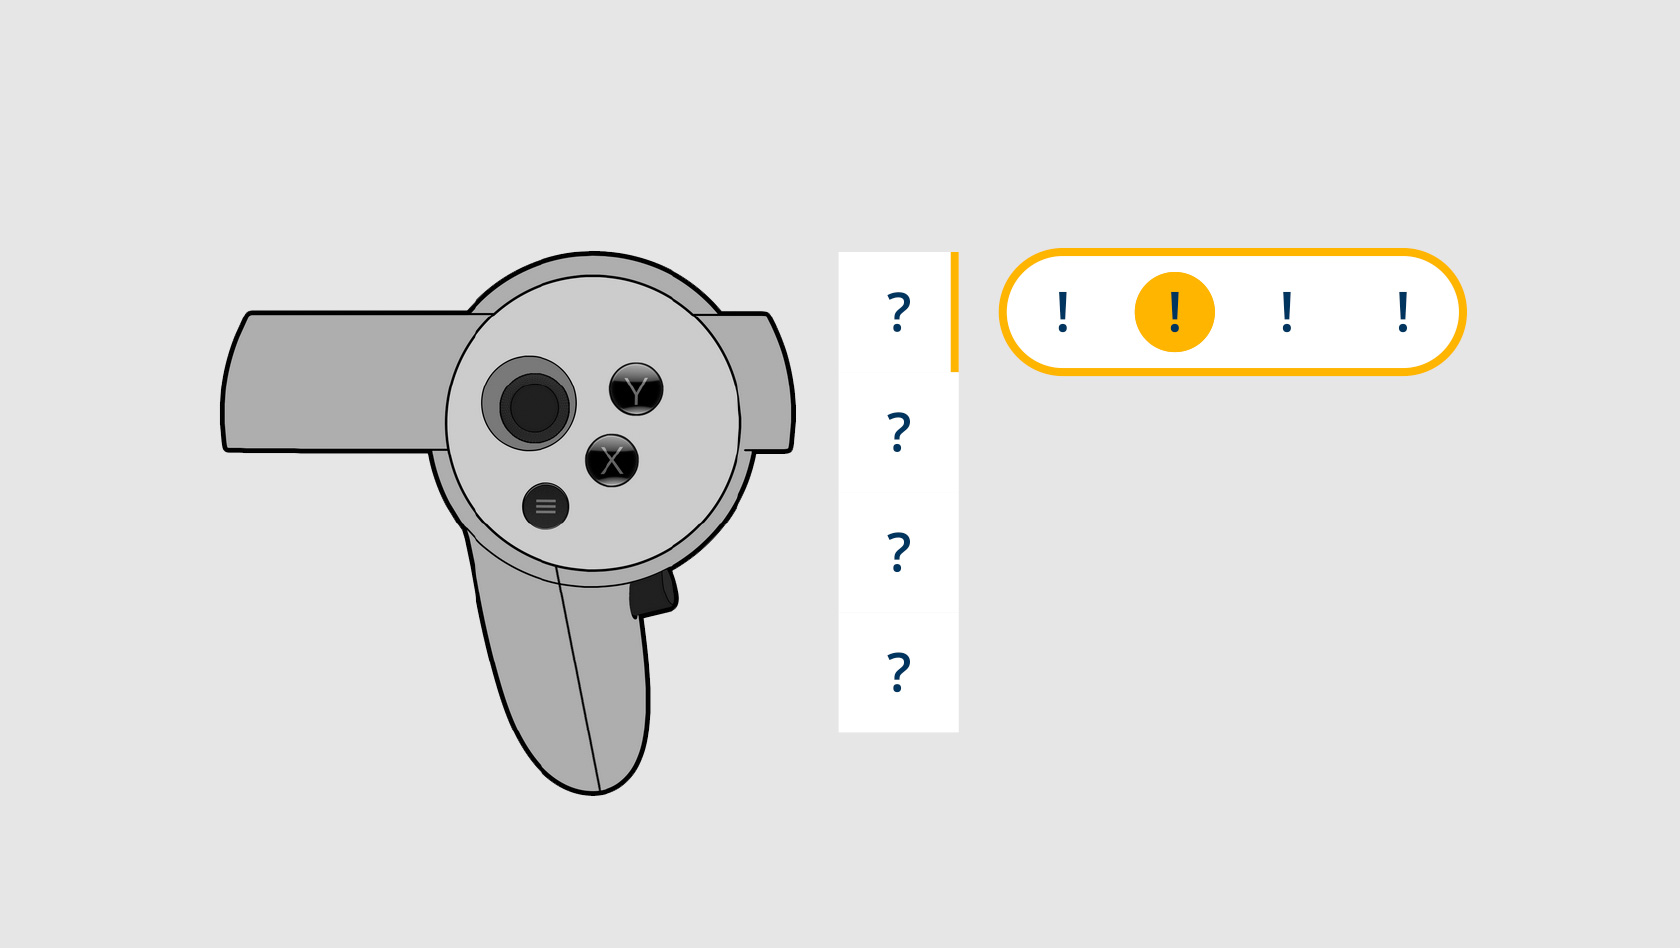
The first step was to create a future-proof UI layout that would allow for adding and removing menus and tools in the future without breaking the design.
The mockup below shows the UI modularity, with placeholders representing any new or to-be-removed menus/ tools.
Information Architecture
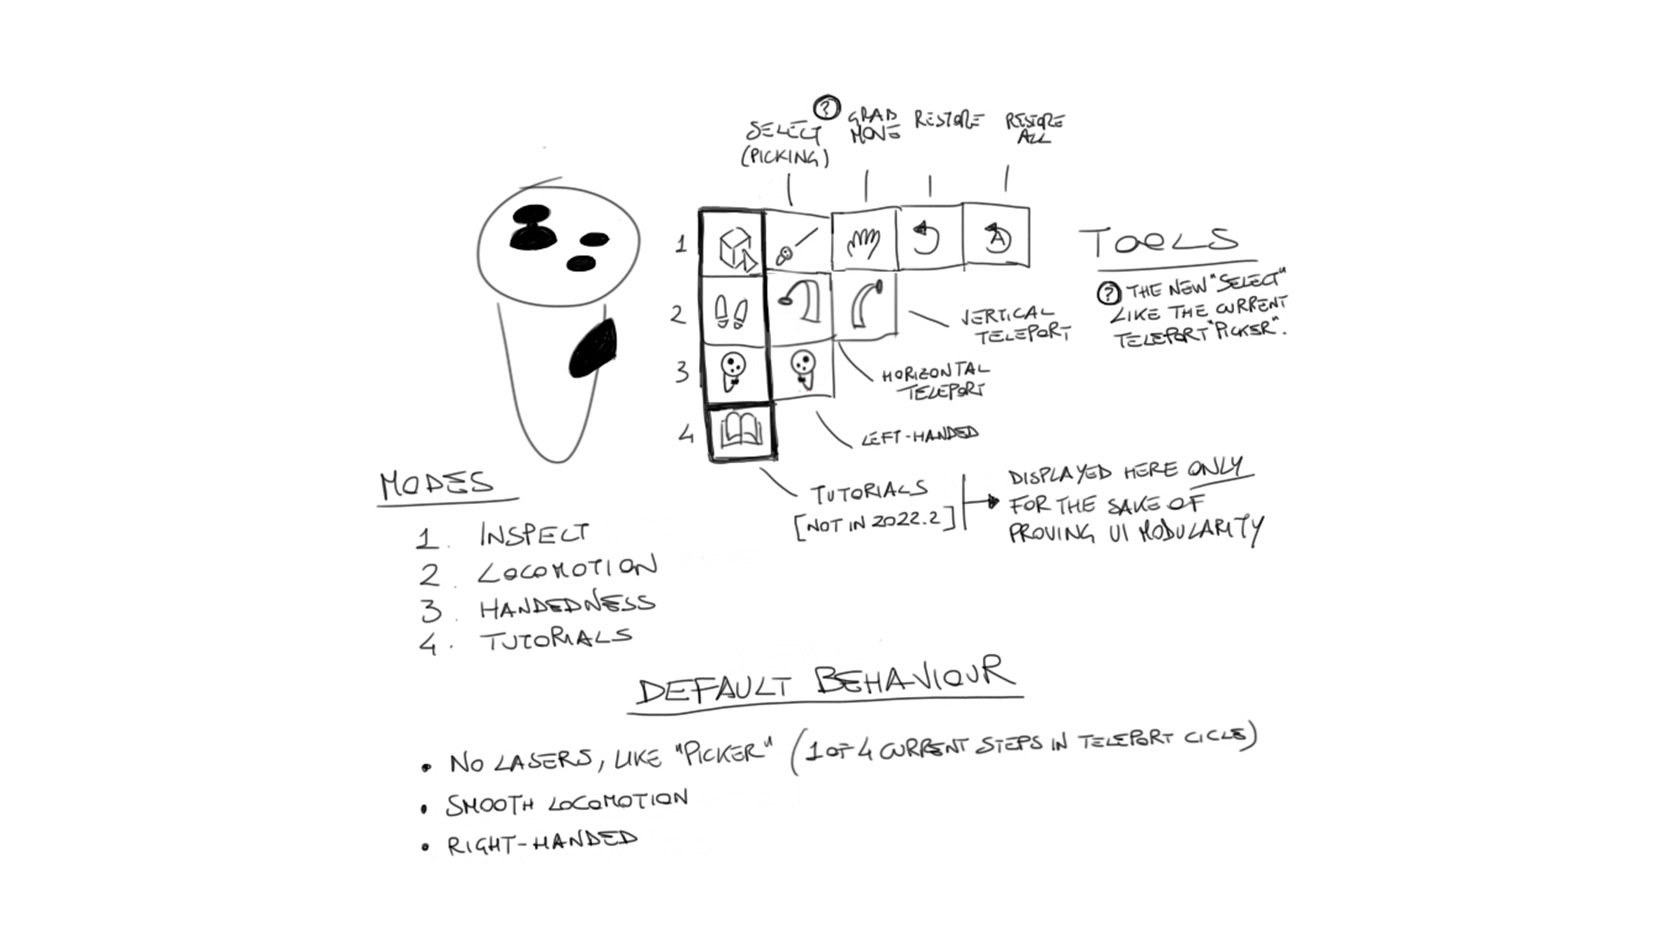
After validating the design concept for the WebXR UI layout, I started working on the information architecture to organise a series of tools and features based on our customer needs and roadmap.
The sketch below shows the mode menus and tools included in the very first iteration of the Reach WebXR UI.
Click-through Mockups
As a next step, I created a click-through mockup to quickly test and validate the user flows and the different states of some UI elements, such as enabled/disabled tools and minimised menus showing any currently enabled tool.

Prototyping, Testing, Iterating
When designing for immersive experiences, you don't want to use 2D mockups only. It's paramount, if not mandatory, to review, test and validate your design in immersive mode.
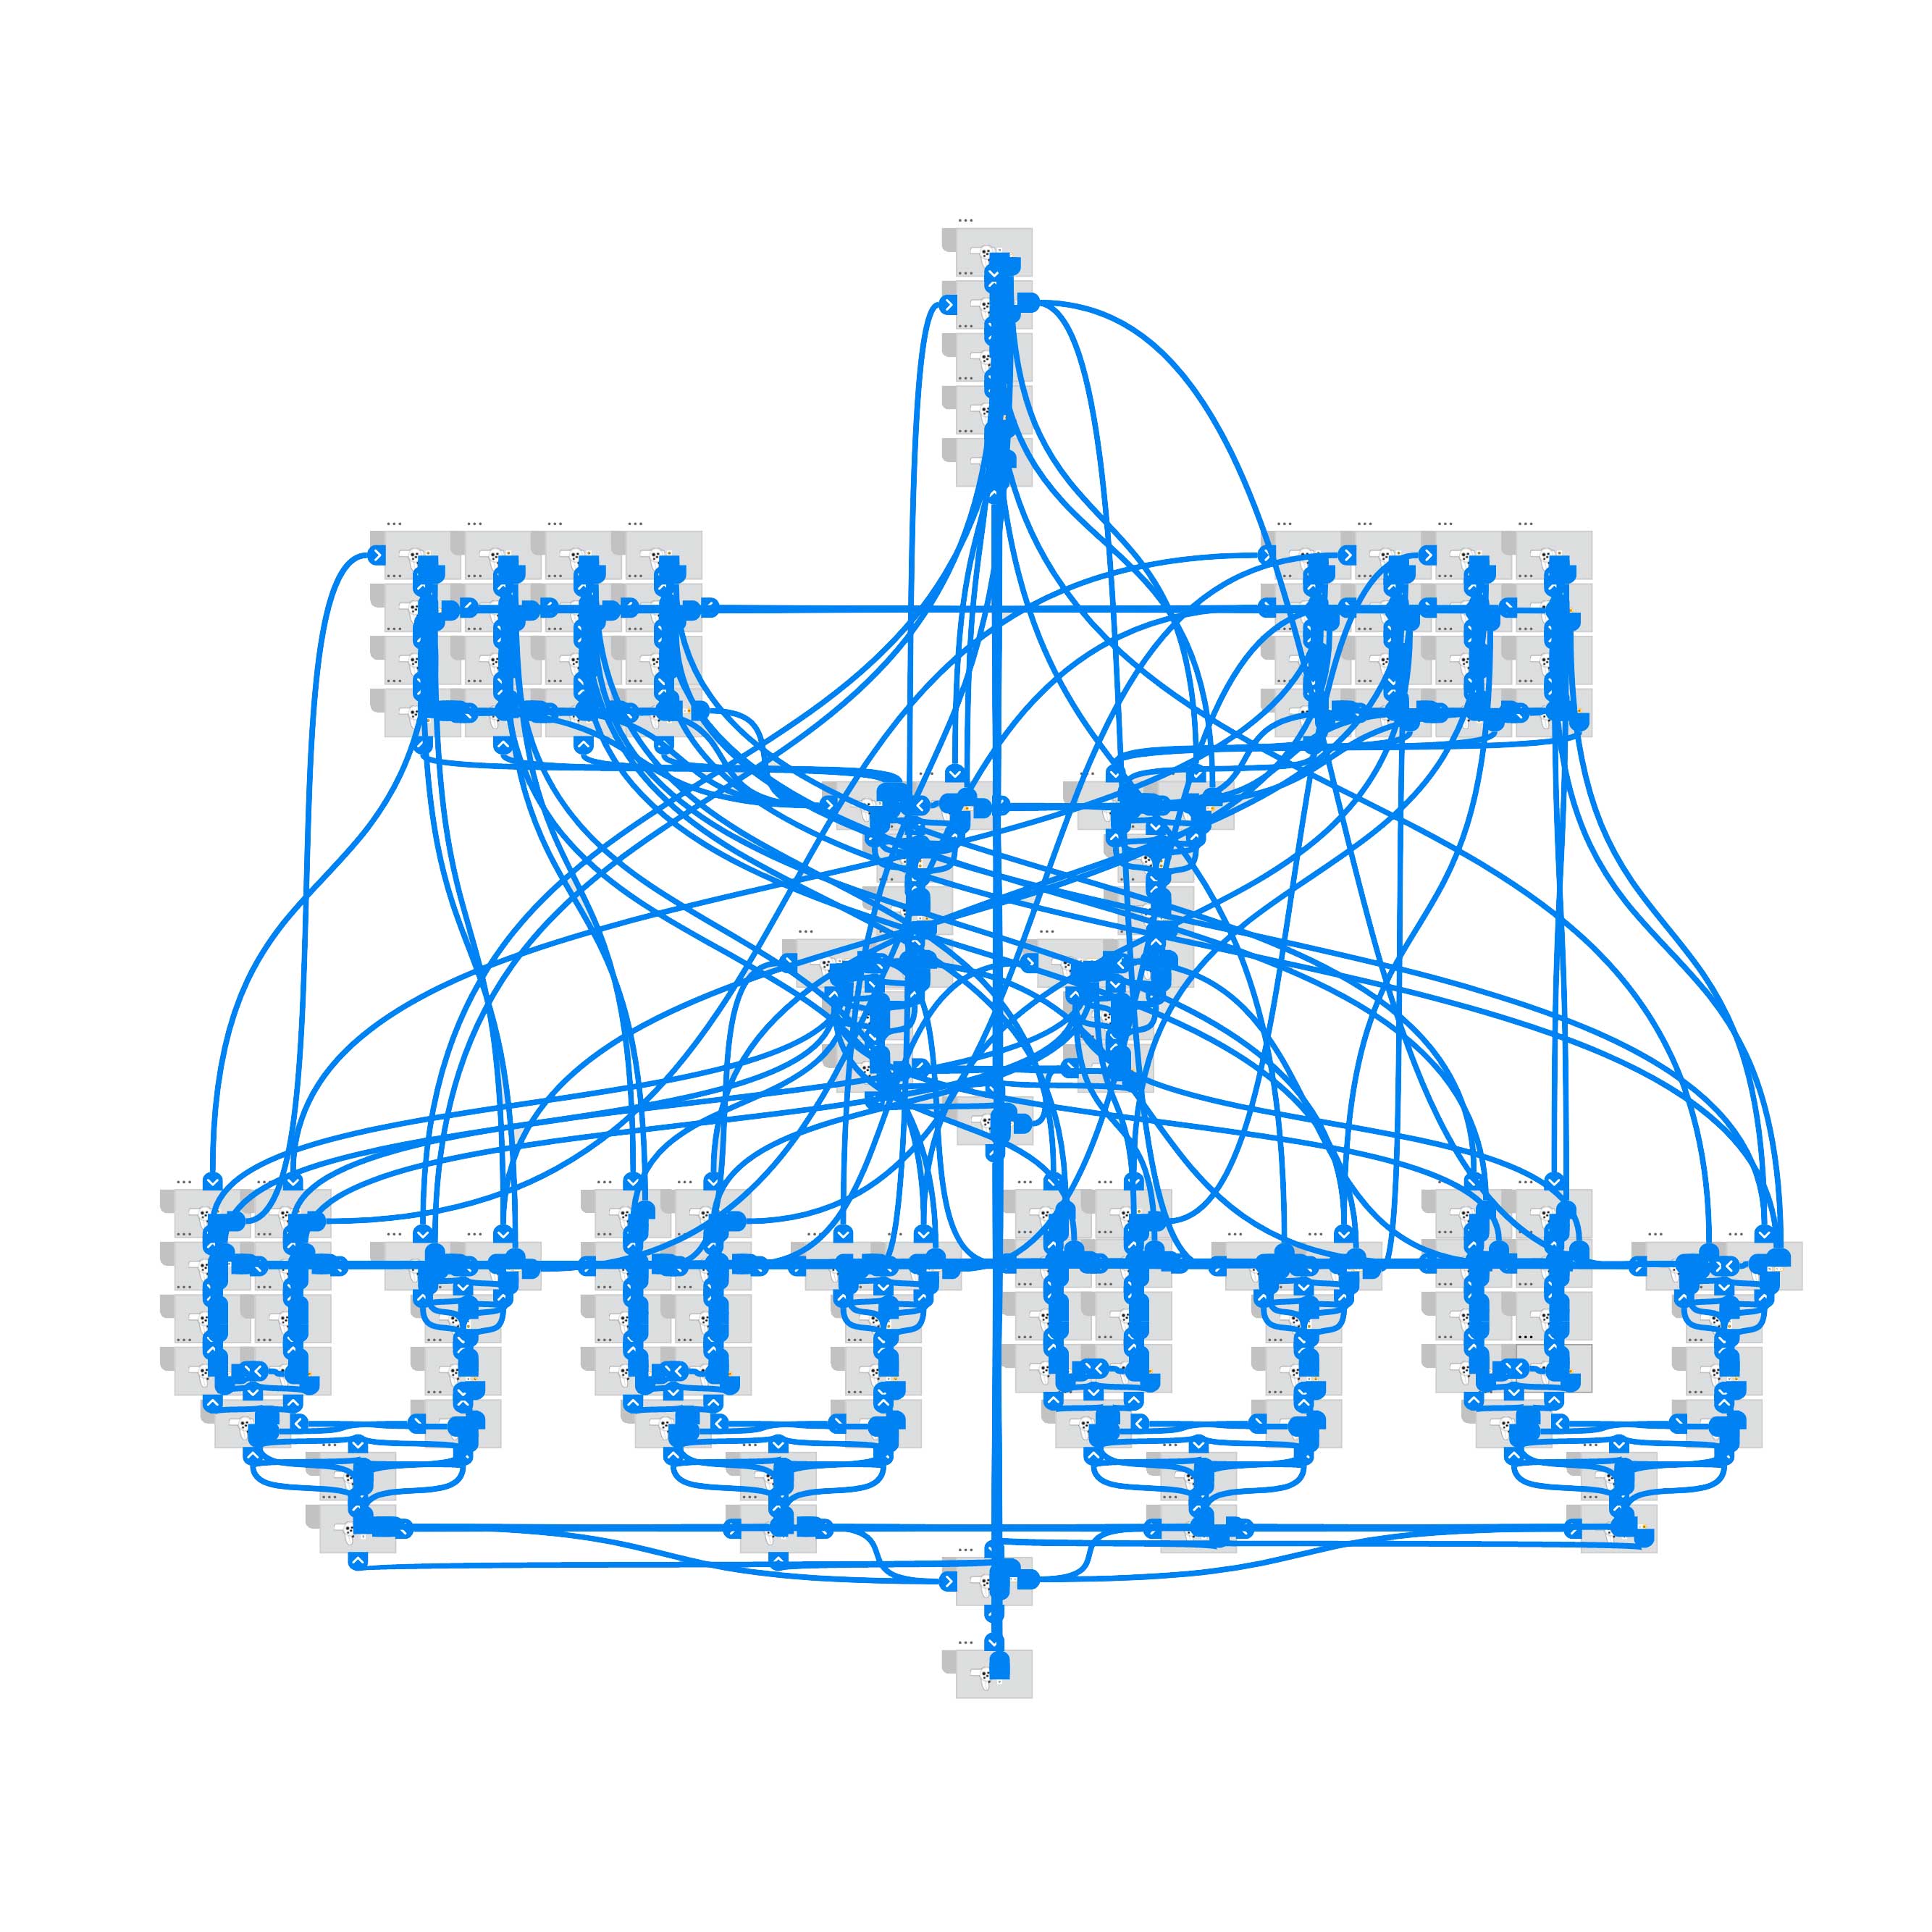
So, after completing all these initial steps, I moved on to coding a WebXR prototype.
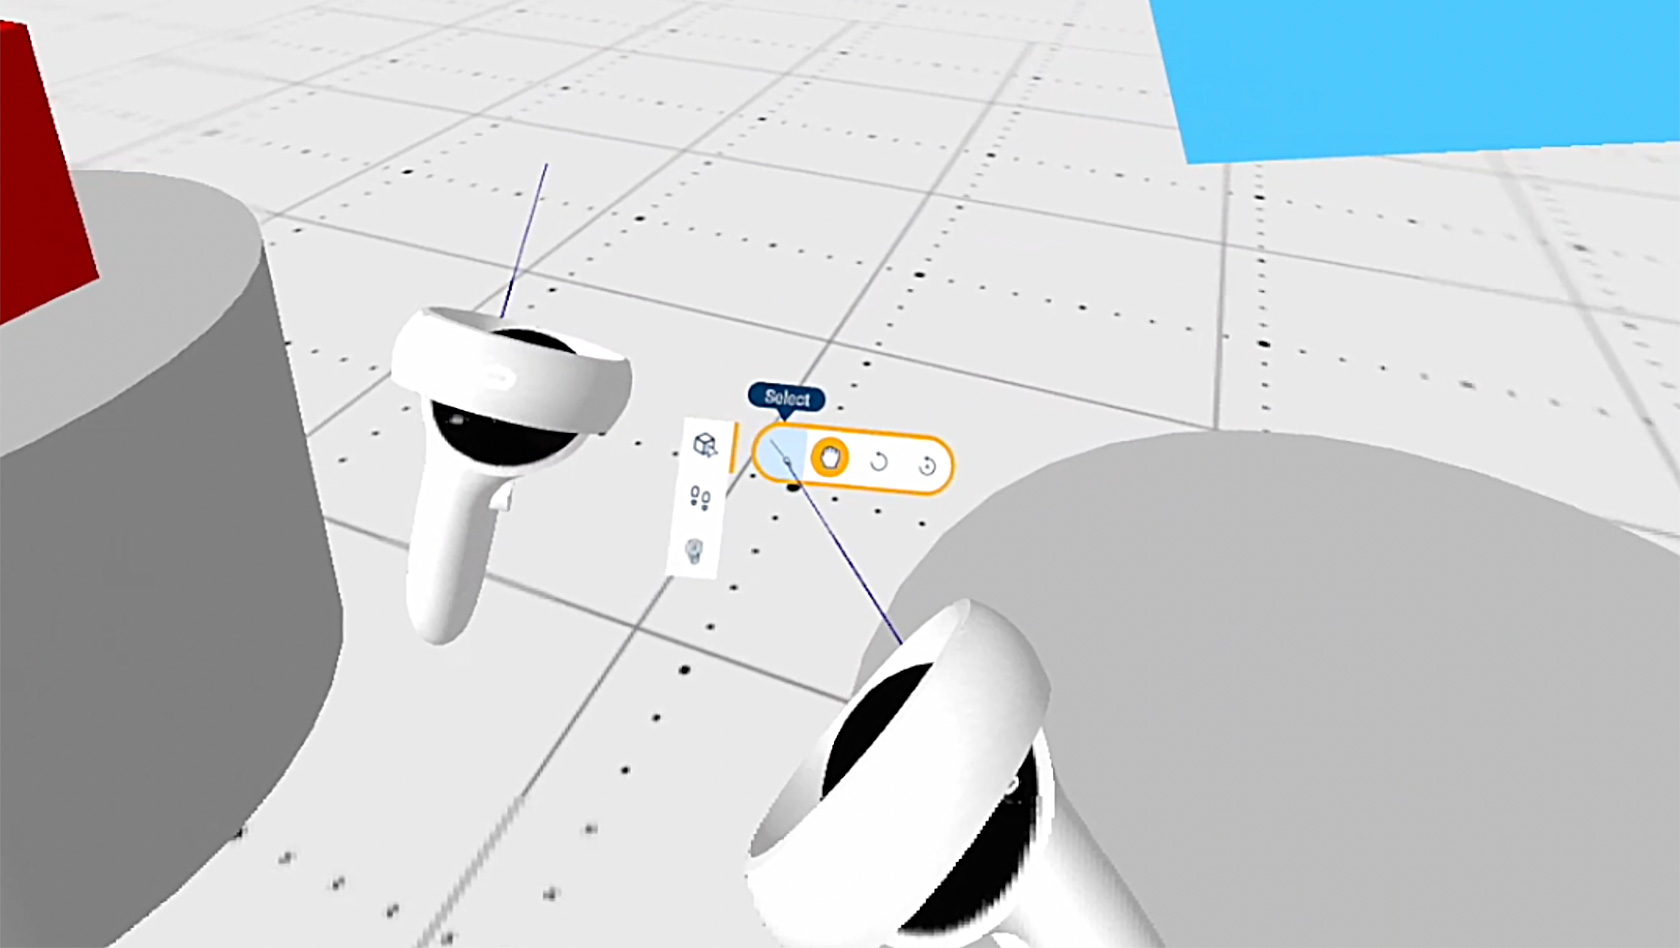
In addition to bringing the WebXR UI to life, I also created a basic virtual environment with a few objects in it for the users to complete a series of tasks during our first round of usability testing sessions.
This allowed us to observe the users' behaviours and gather valuable empirical data.
The image below shows the first version of the WebXR UI prototype.
Once we completed our usability studies (I ran the user testing sessions as a Moderator with the participation of the Senior Product Manager as a second observer), I created detailed reports to share all the negative and positive findings and provide the relevant design recommendation.
So I iterated on the WebXR UI, making a series of changes to its information architecture and layout and including additional features to ensure good UX, especially for 1st-time users.
From there, I coded a new WebXR prototype implementing all the design recommendations. Then, we ran another round of usability testing sessions, which gave us the excellent results we expected and some more valuable feedback to polish the WebXR UI even further.
At that point, we were ready to start developing and implementing the immersive UI in the Reach platform.
The subsequent sections show all the design material I created for the final version of the Reach WebXR UI.
Custom Icons
For the Reach immersive UI, I designed pixel-perfect custom icons for all its mode menus and tools buttons.
The images below show the keyshapes + orthogonals and the pixel grid for each asset.
It's worth noting that, following the empirical data from the usability testing sessions, we moved from a "light" to a "dark" theme to improve contrast and readability.
INSPECT icon
SELECT icon
GRAB icon
RESTORE POSITION icon
RESTORE ALL POSITIONS icon
TOOLBOX icon
TELEPORT icon
LEFT-HANDED icon
HELP MENU icon
EXIT XR icon
Onboarding Hi-Fi Mockups
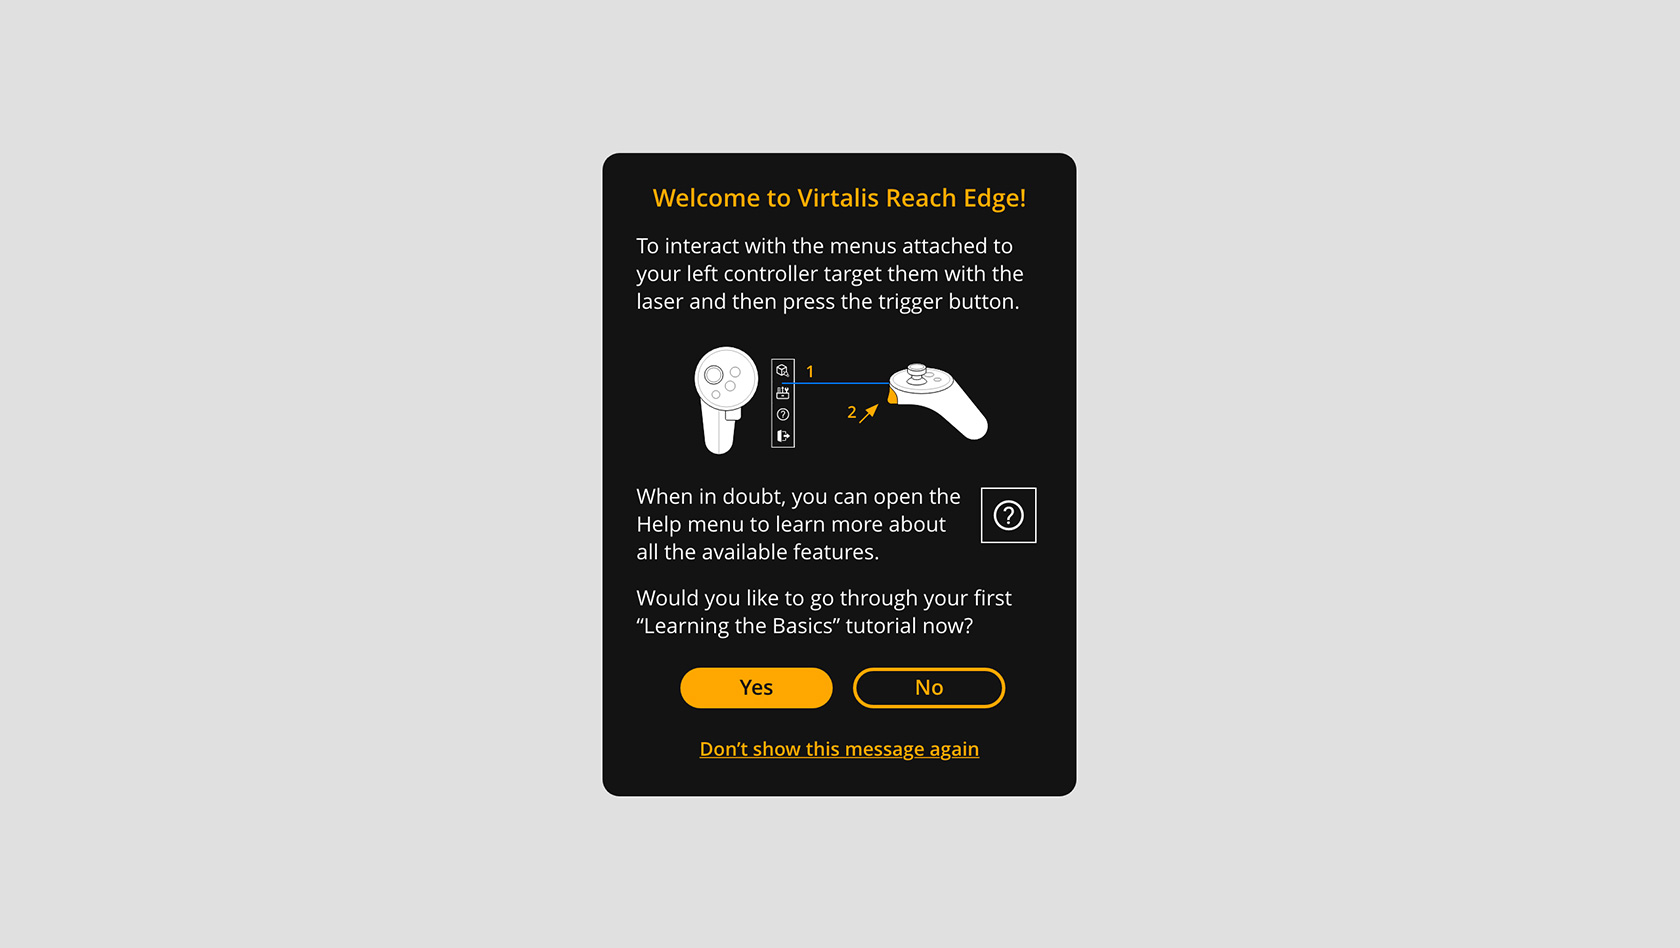
After designing all the custom icons and re-organising the information architecture, I moved on to creating the onboarding for 1st-time users and the UI layout of all its panels.
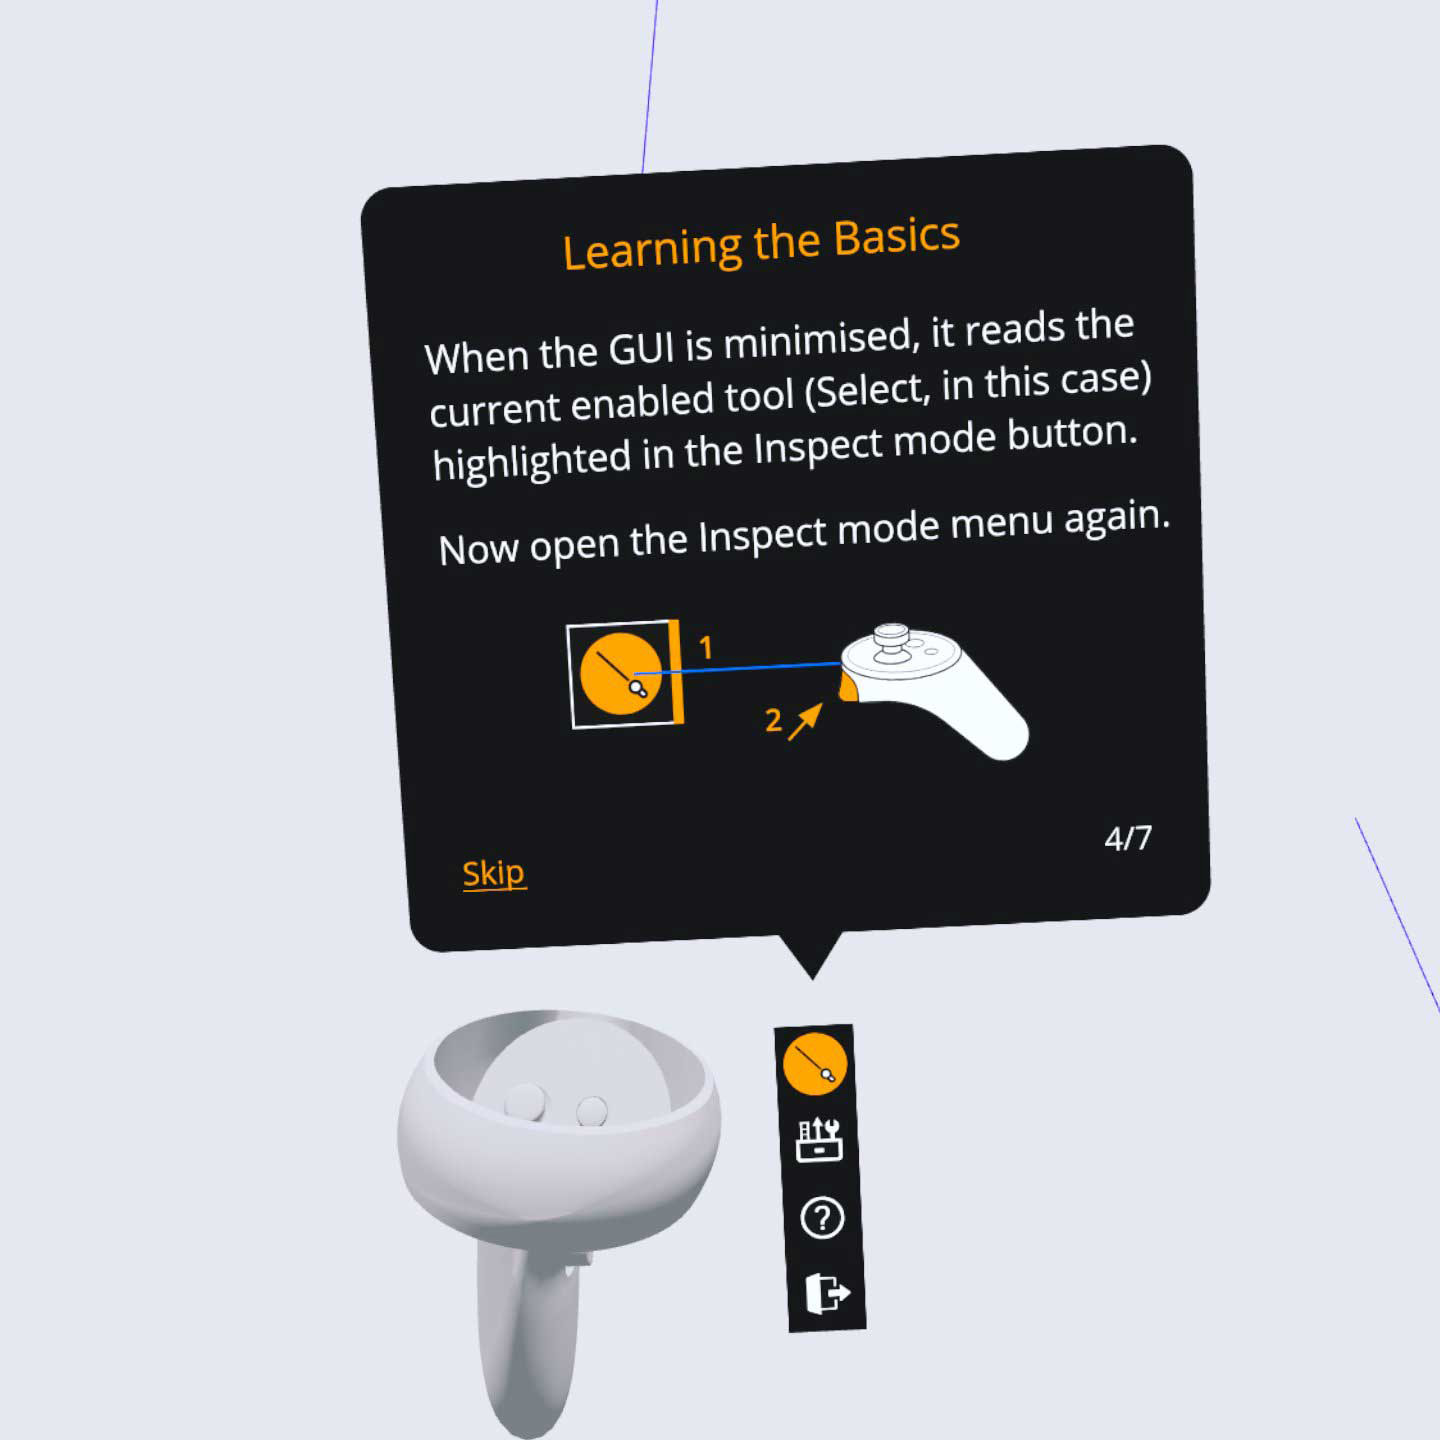
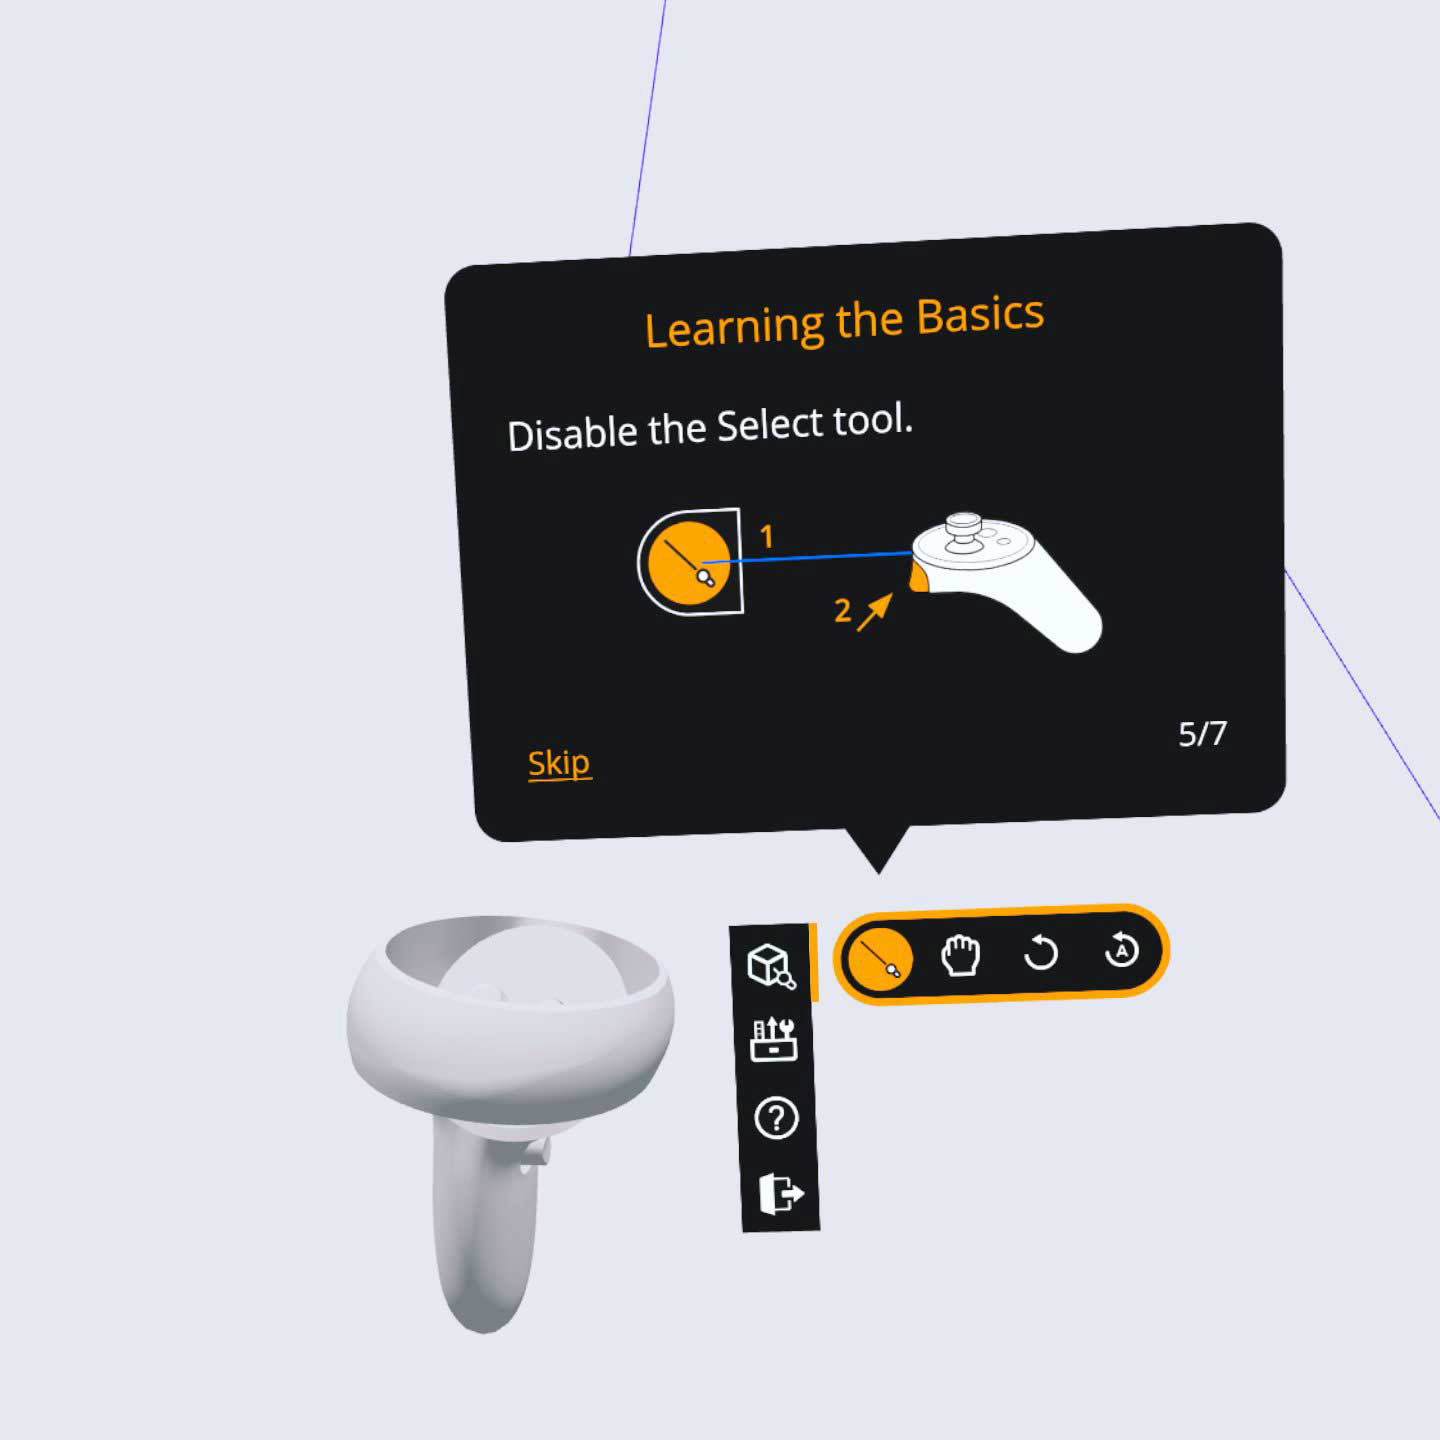
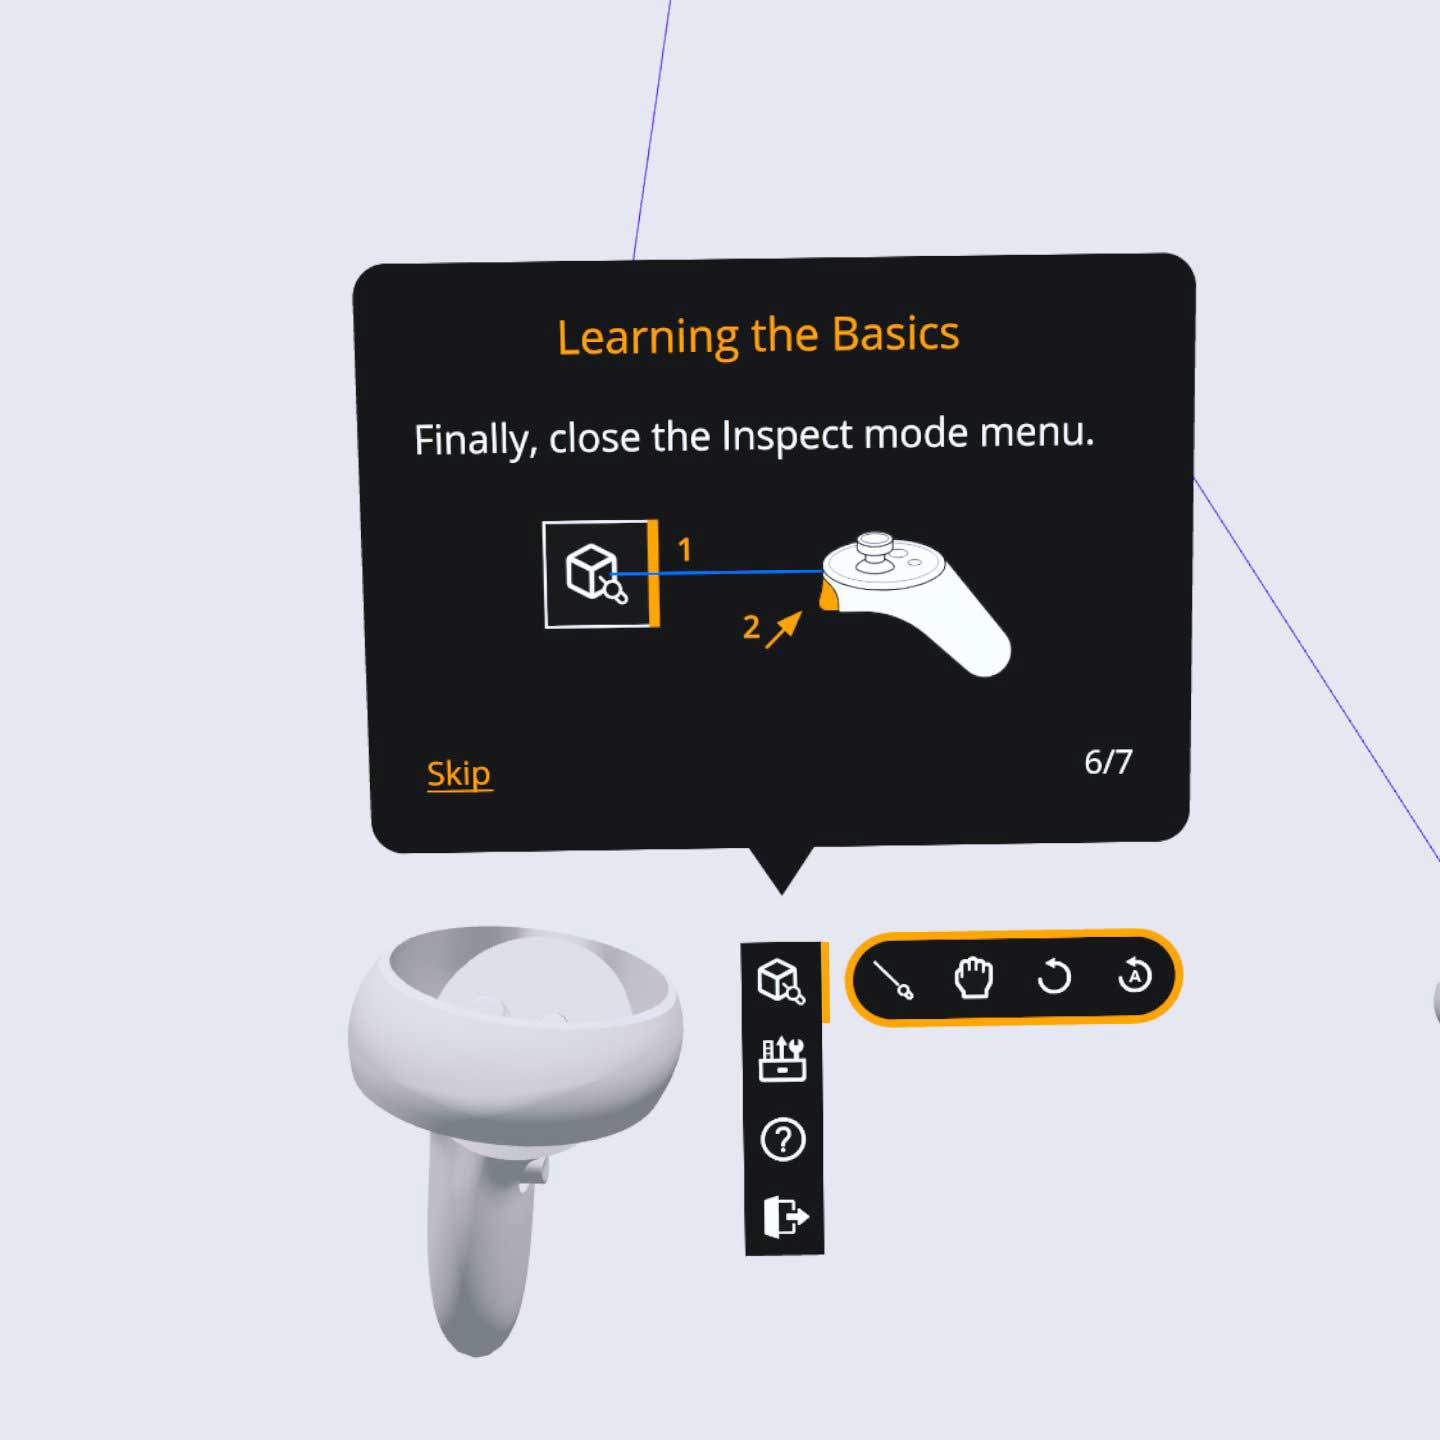
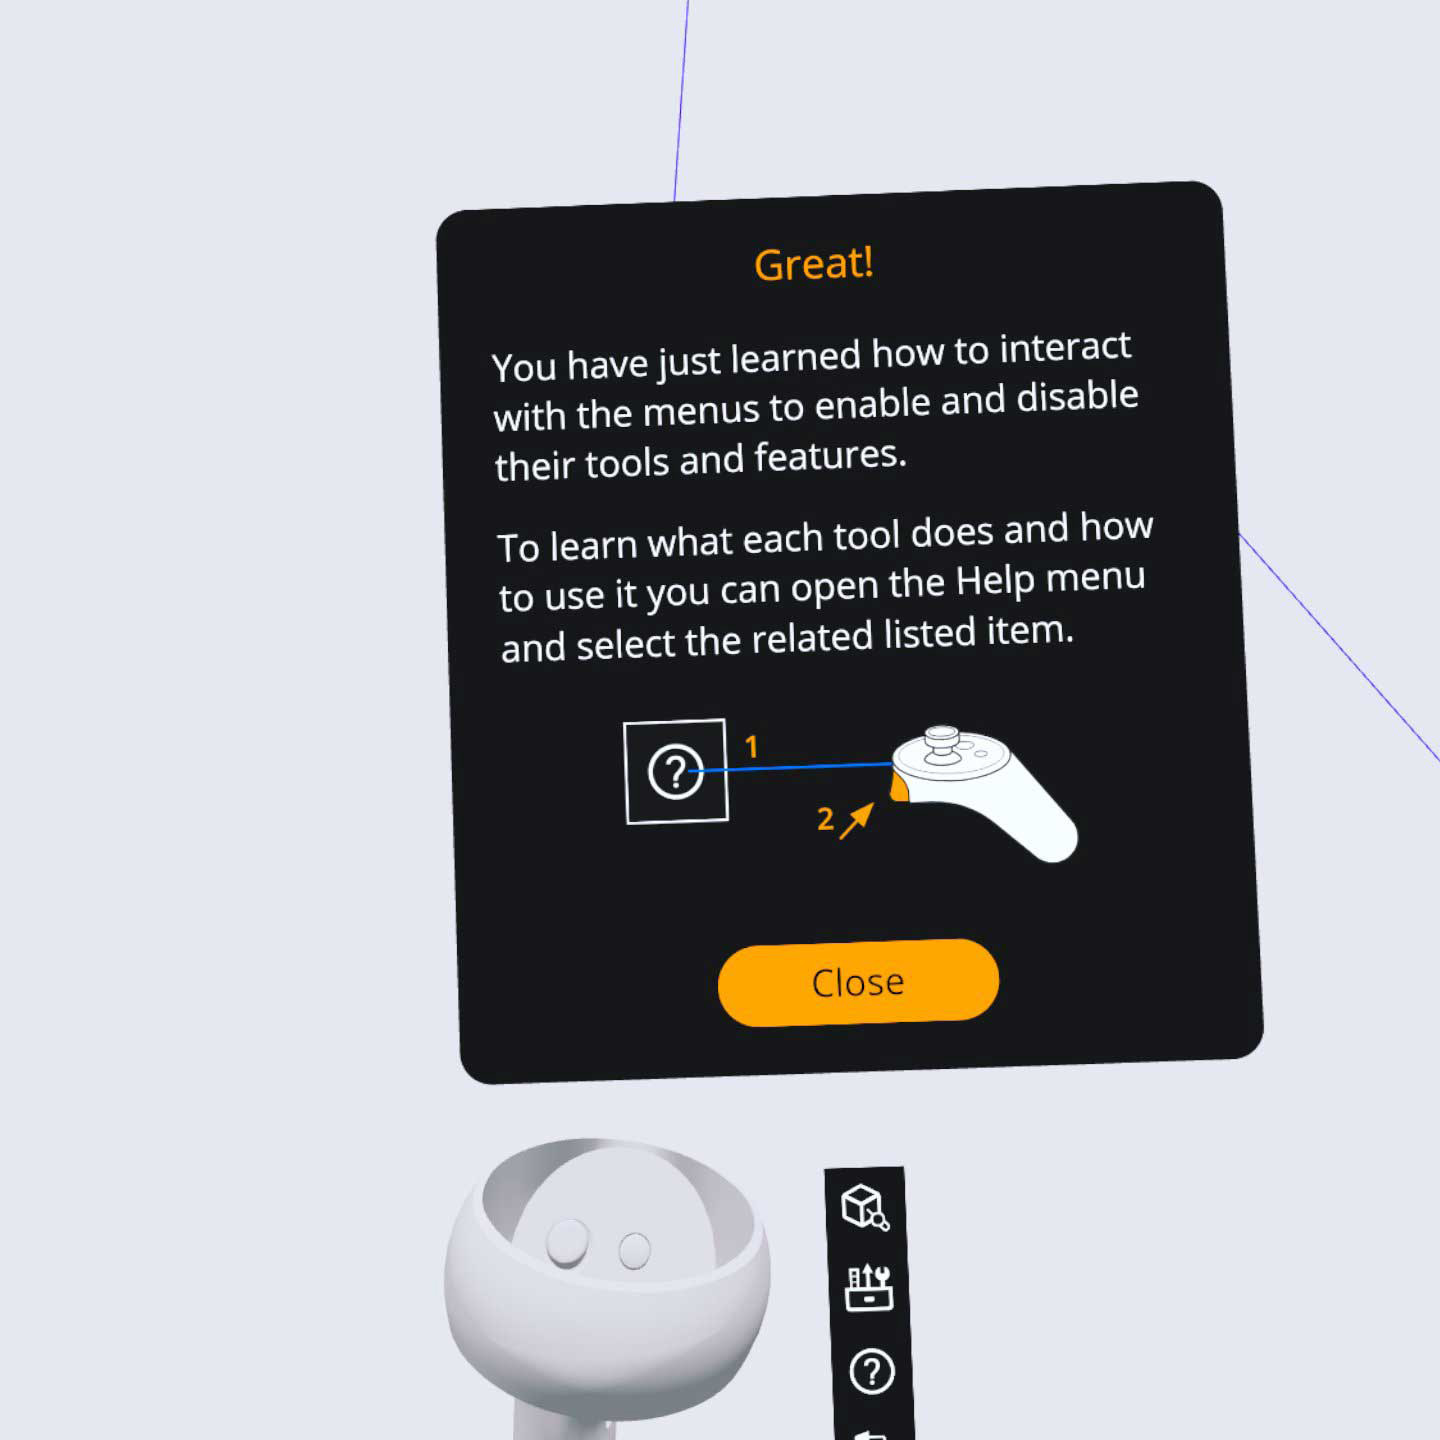
The hi-fi mockups below show the skippable 7-step onboarding sequence and the animated highlight that guides the user through the process.
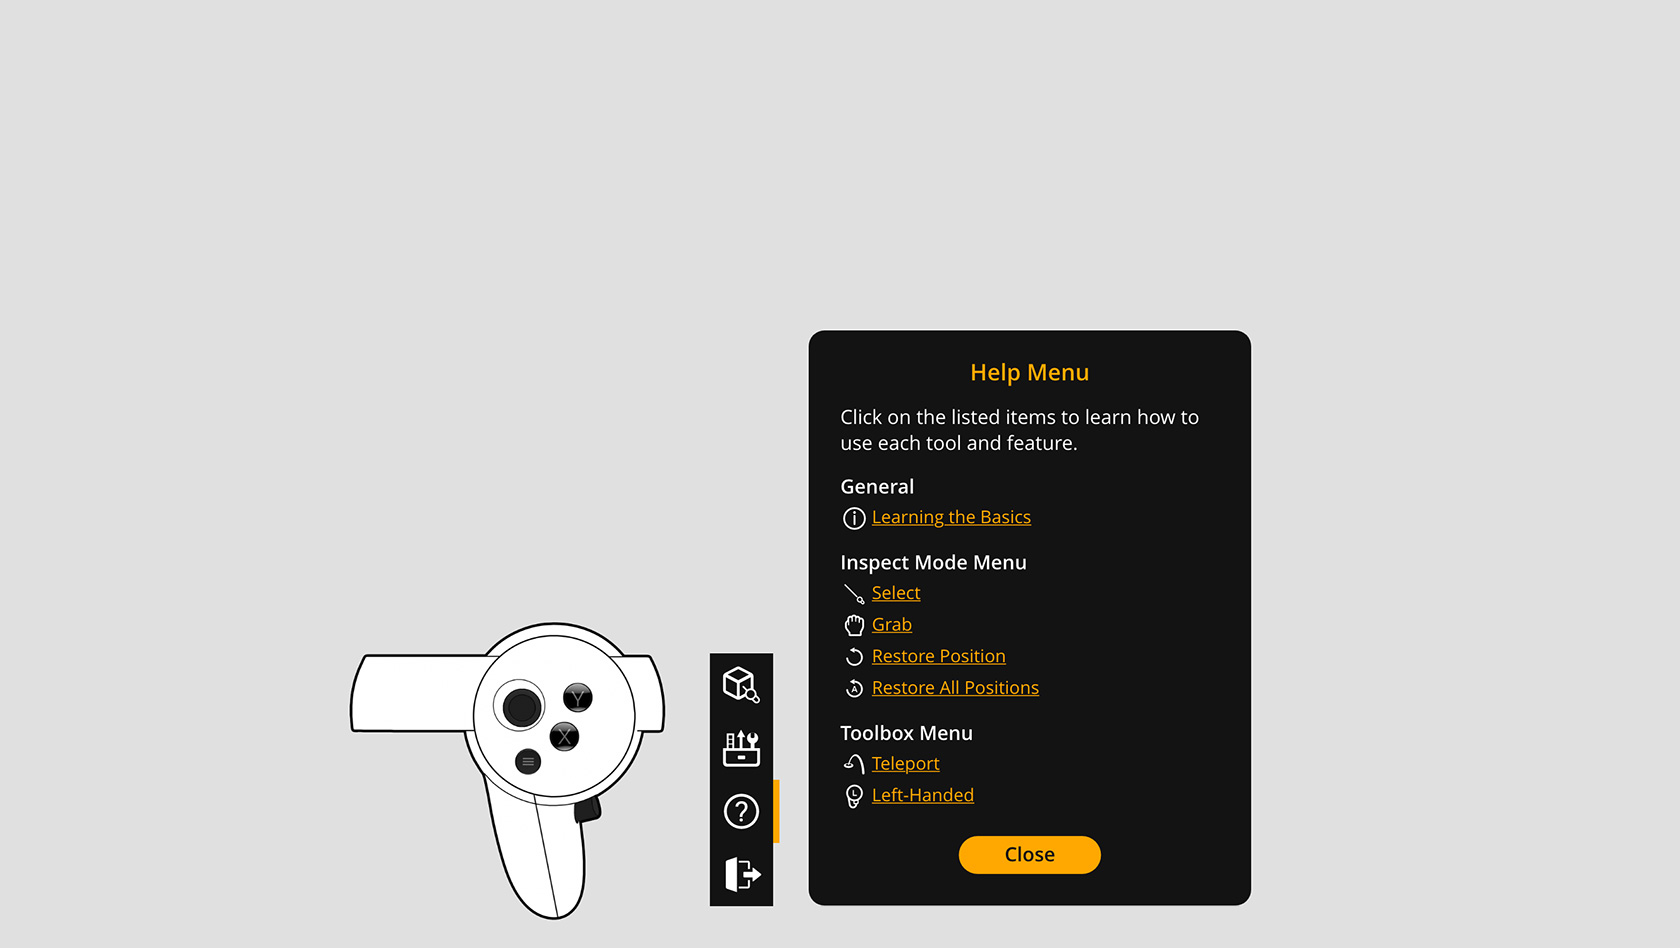
Help Menu Hi-Fi Mockups
Following the first round of usability testing sessions, the second feature I suggested in my design recommendations is a contextual HELP menu, including a series of tutorials that users can access directly while in immersive mode.
The hi-fi mockups below show the UI layout of all the panels, the custom illustrations and the animated highlight that provides visual information about each tool's location.
Final WebXR Prototype
The demo video below shows the final version of the WebXR prototype.
On top of including all the design recommendations we tested and successfully validated during a second round of usability testing sessions, this iteration also implements some final extra polishing such as:
- Brief description of the location of the tool in each tutorial panel
- Animated highlight to provide additional visual clue
The demo video below also shows the mechanics of the tools in the virtual environment we used for the usability testing sessions to observe the users perform and complete a series of assigned tasks.
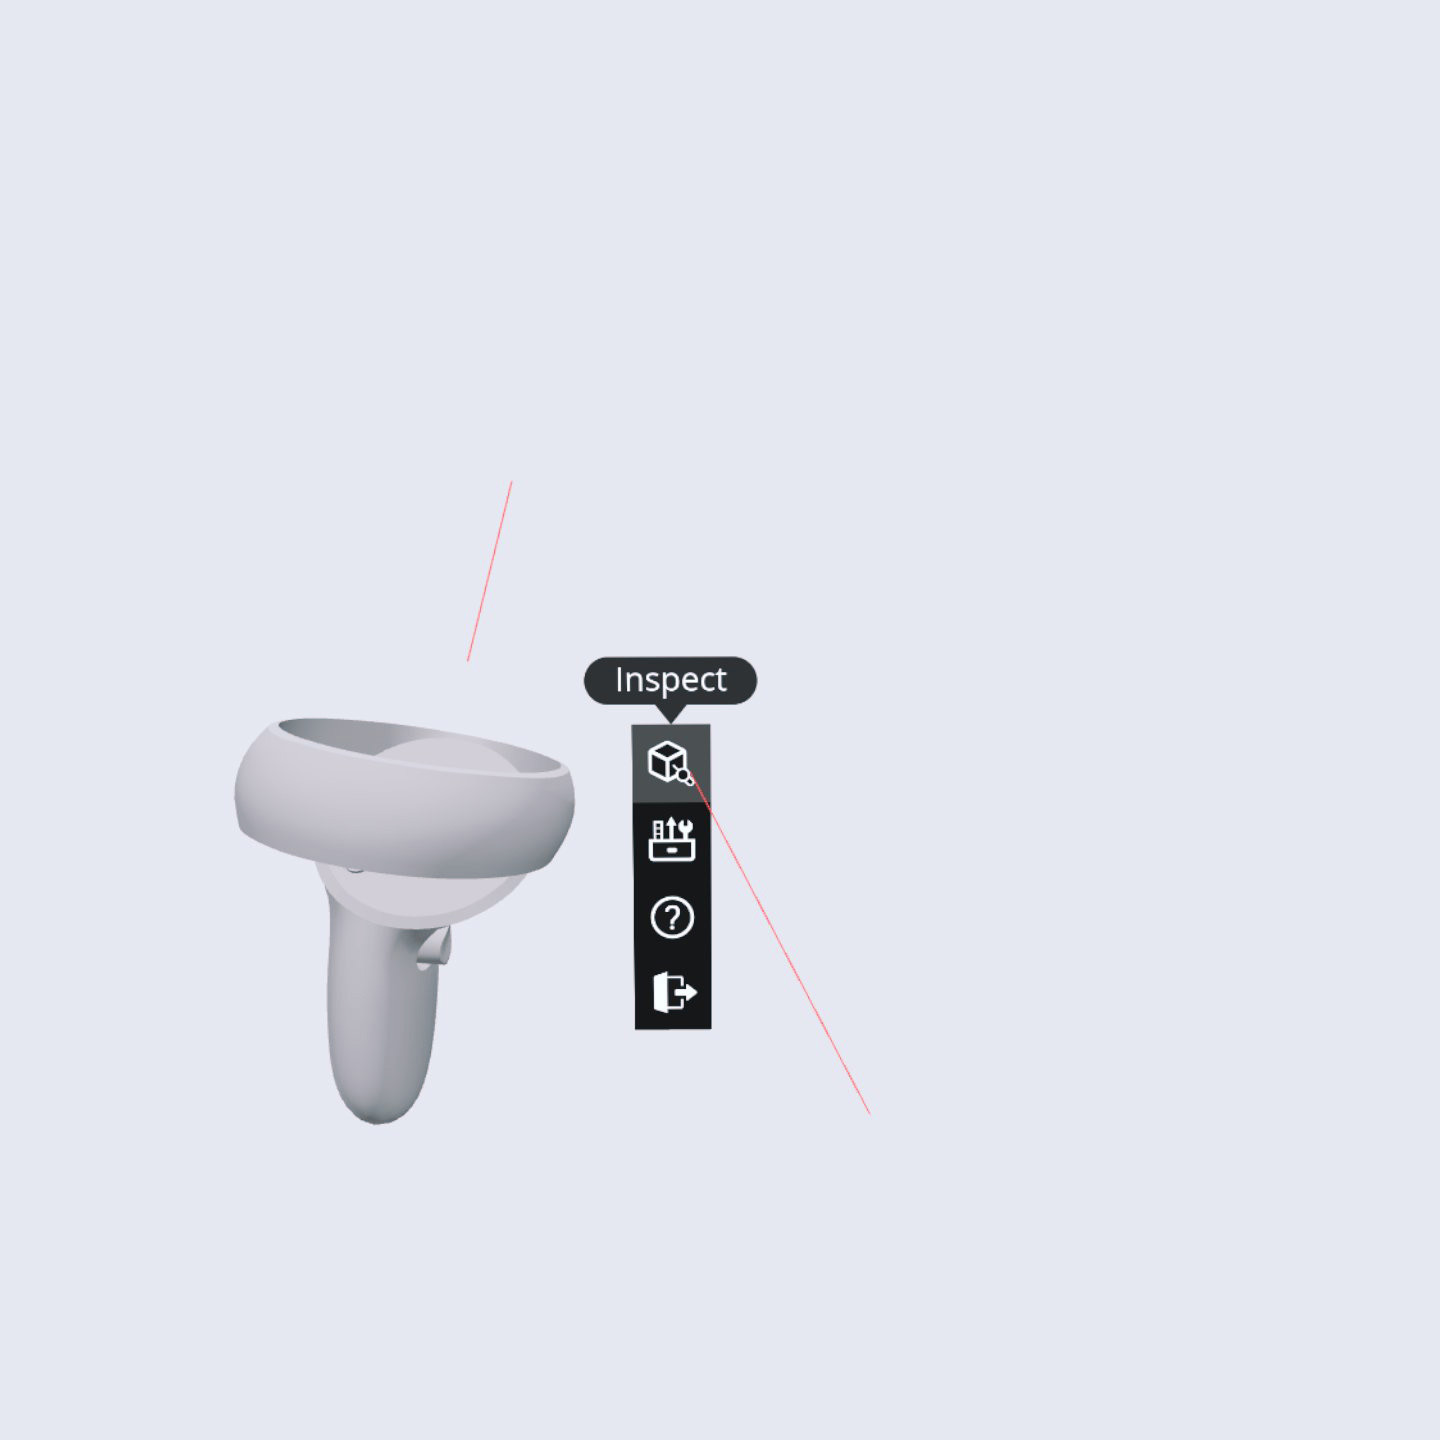
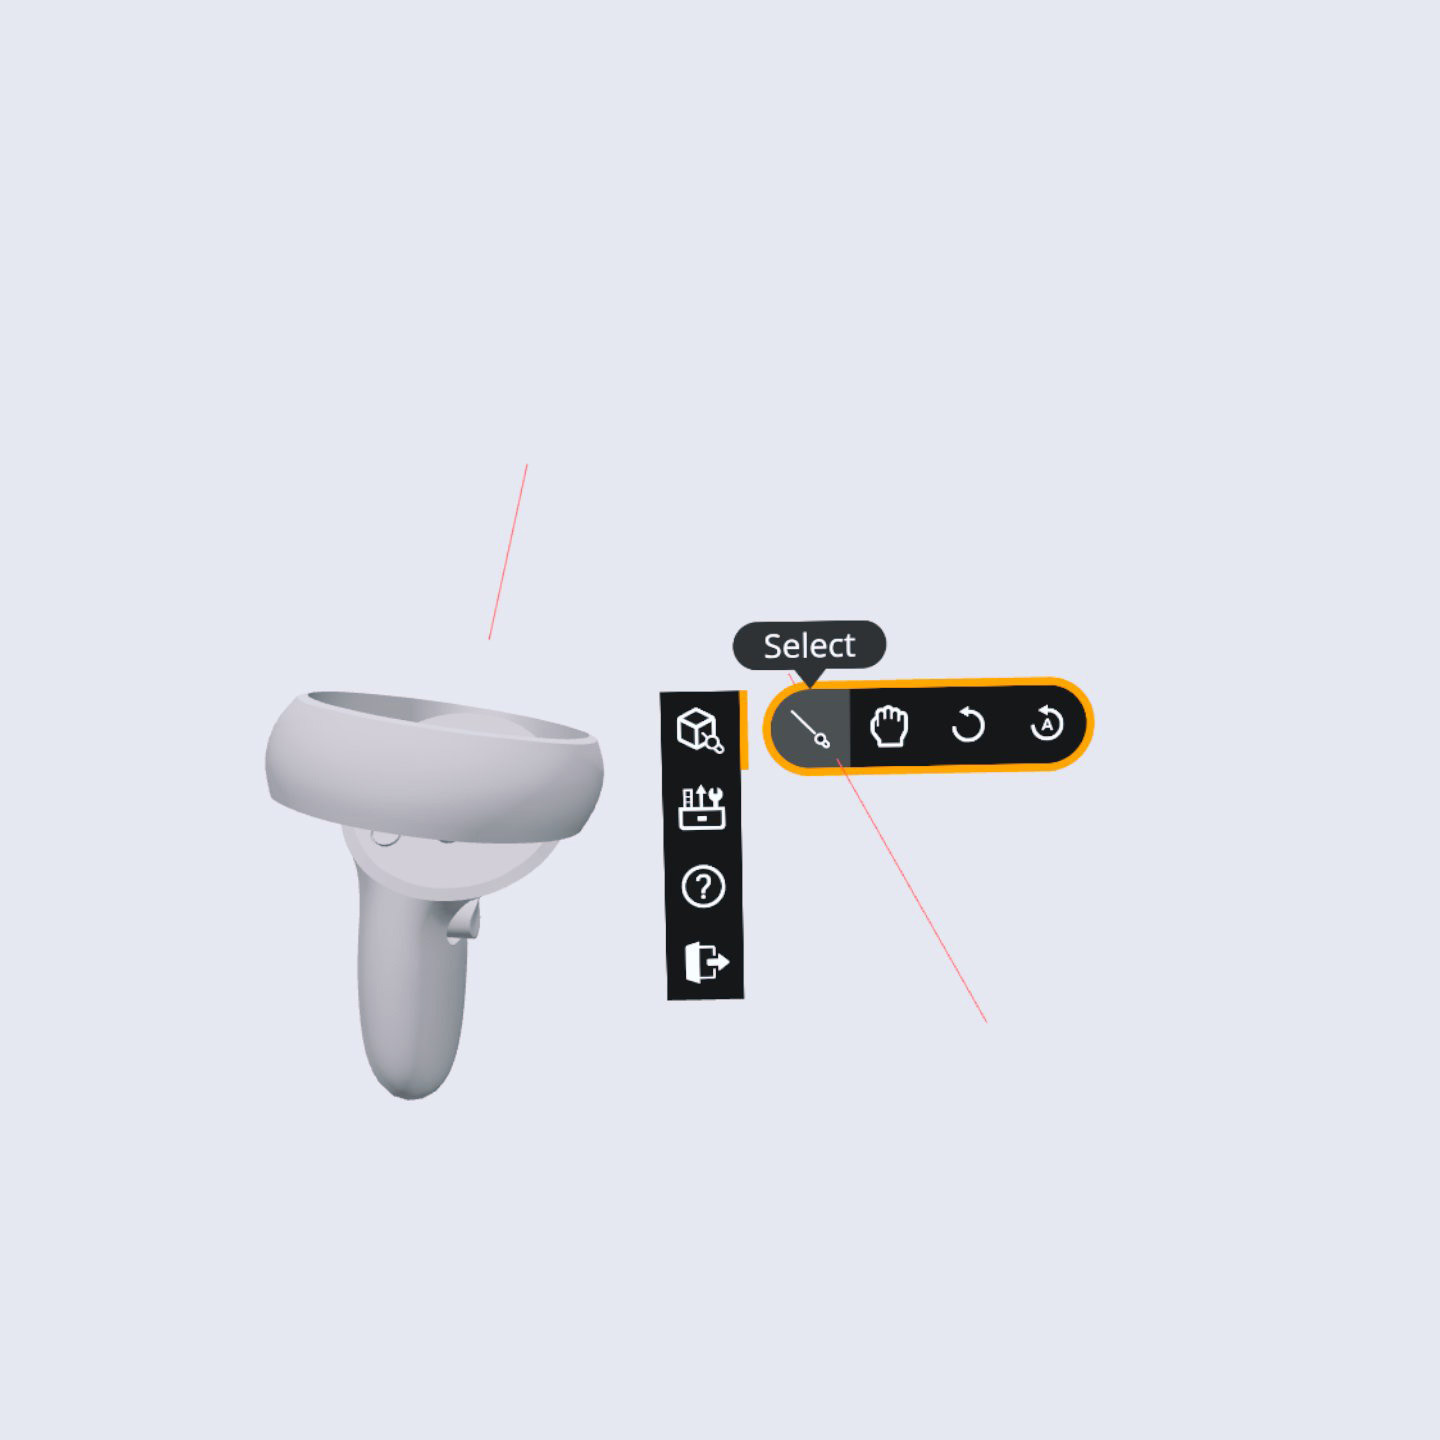
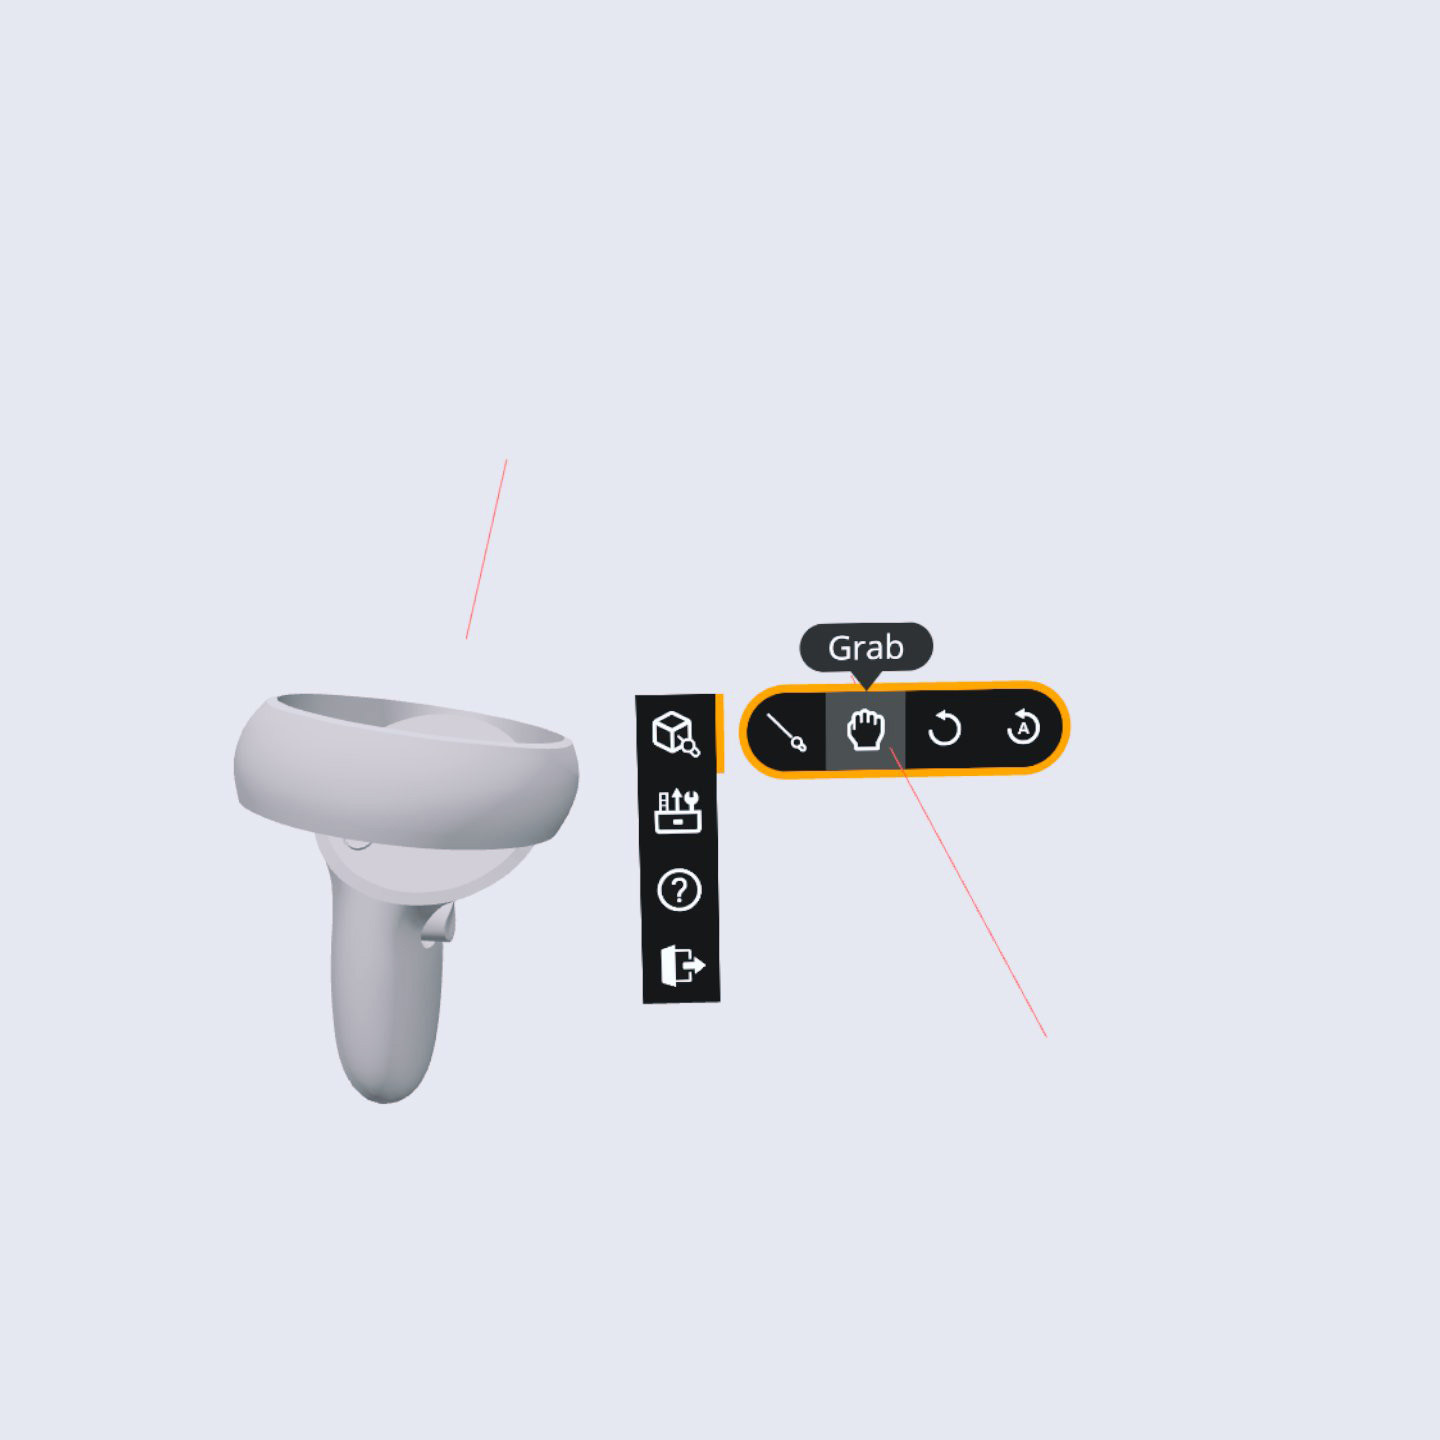
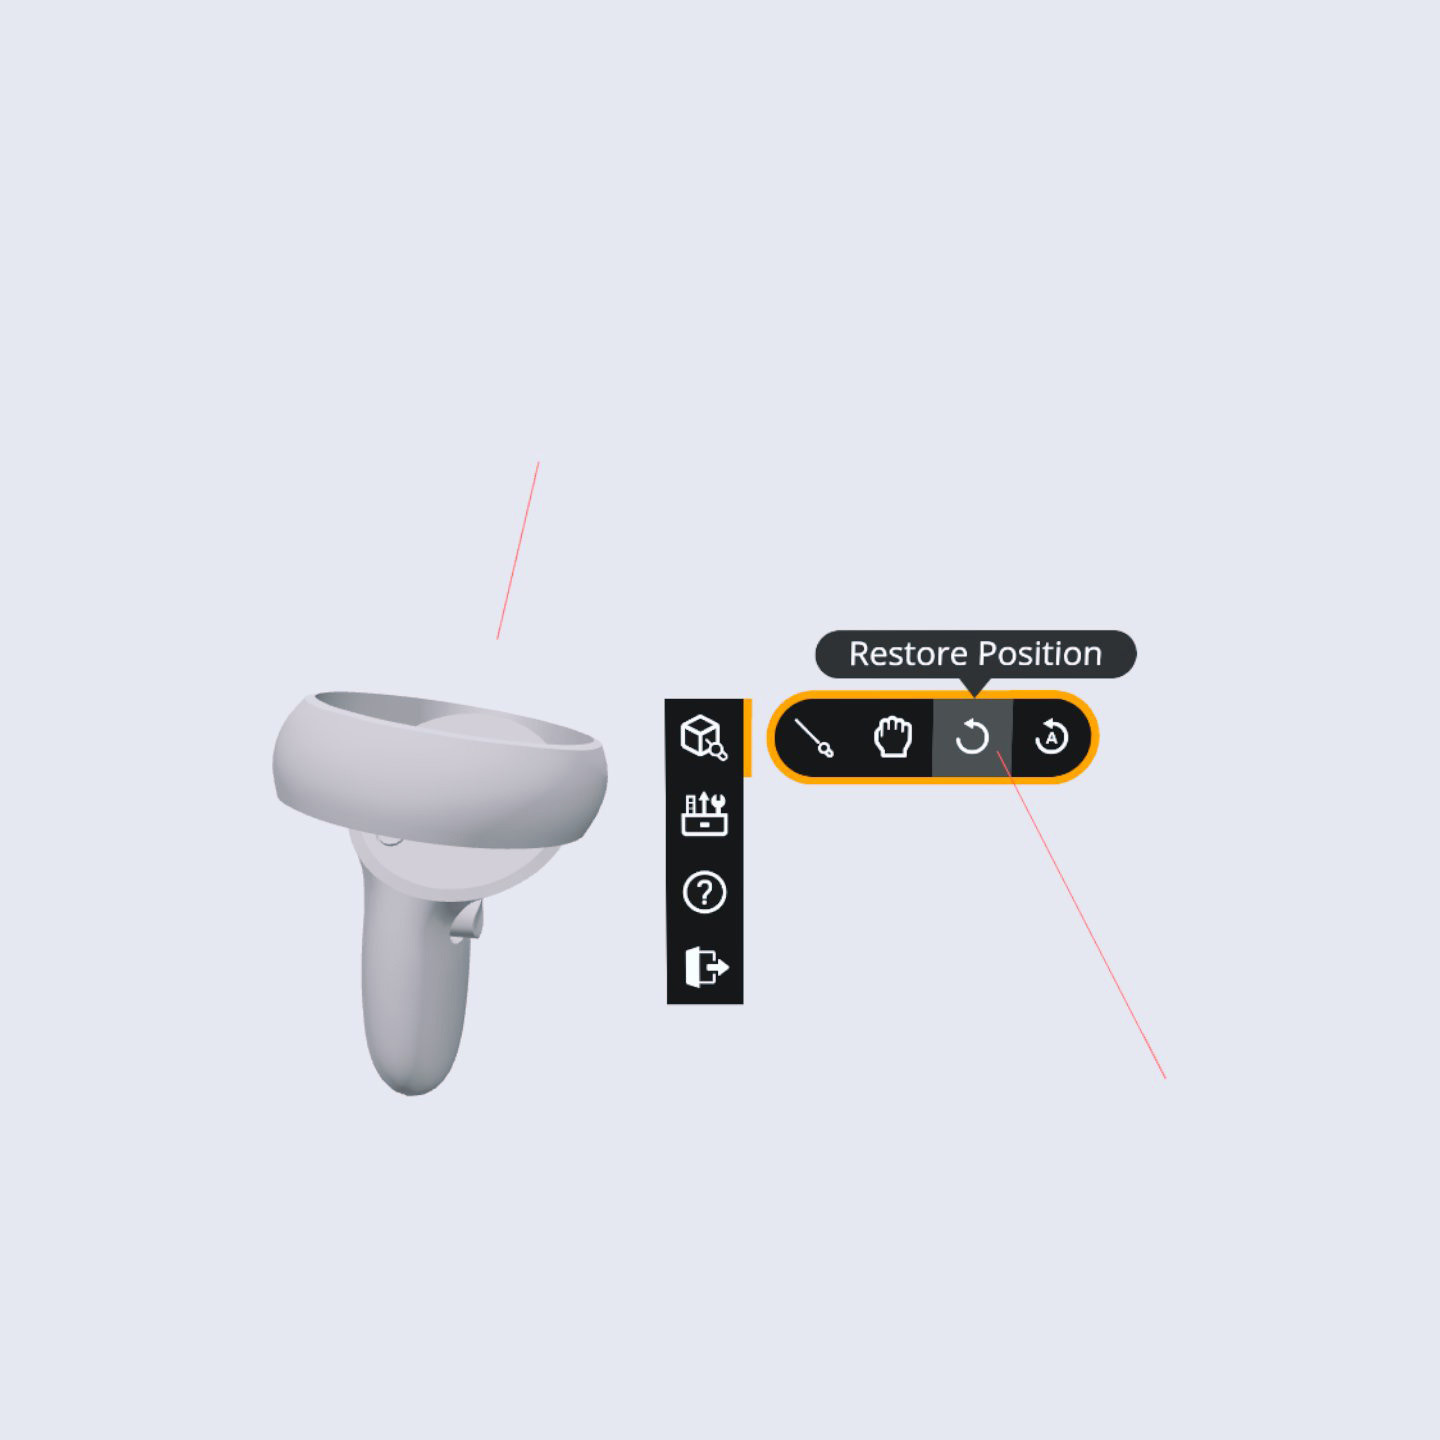
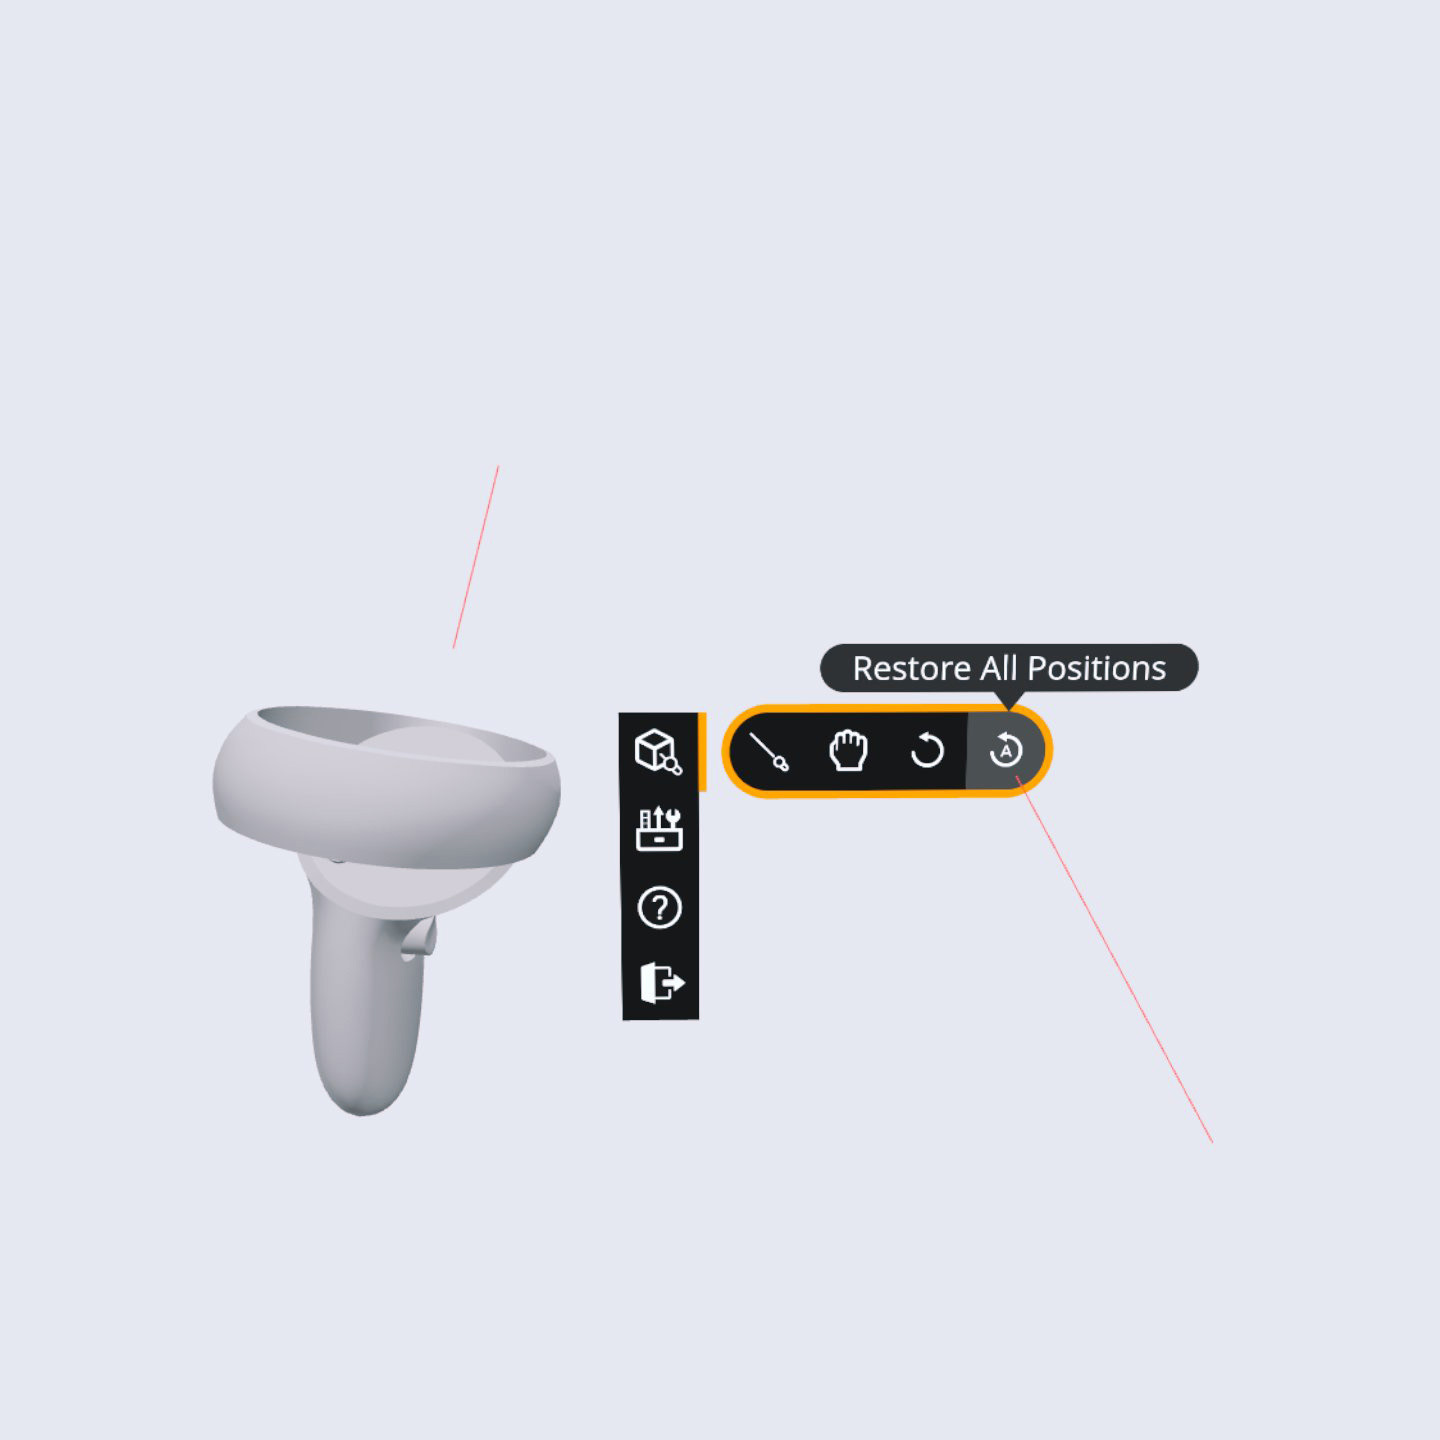
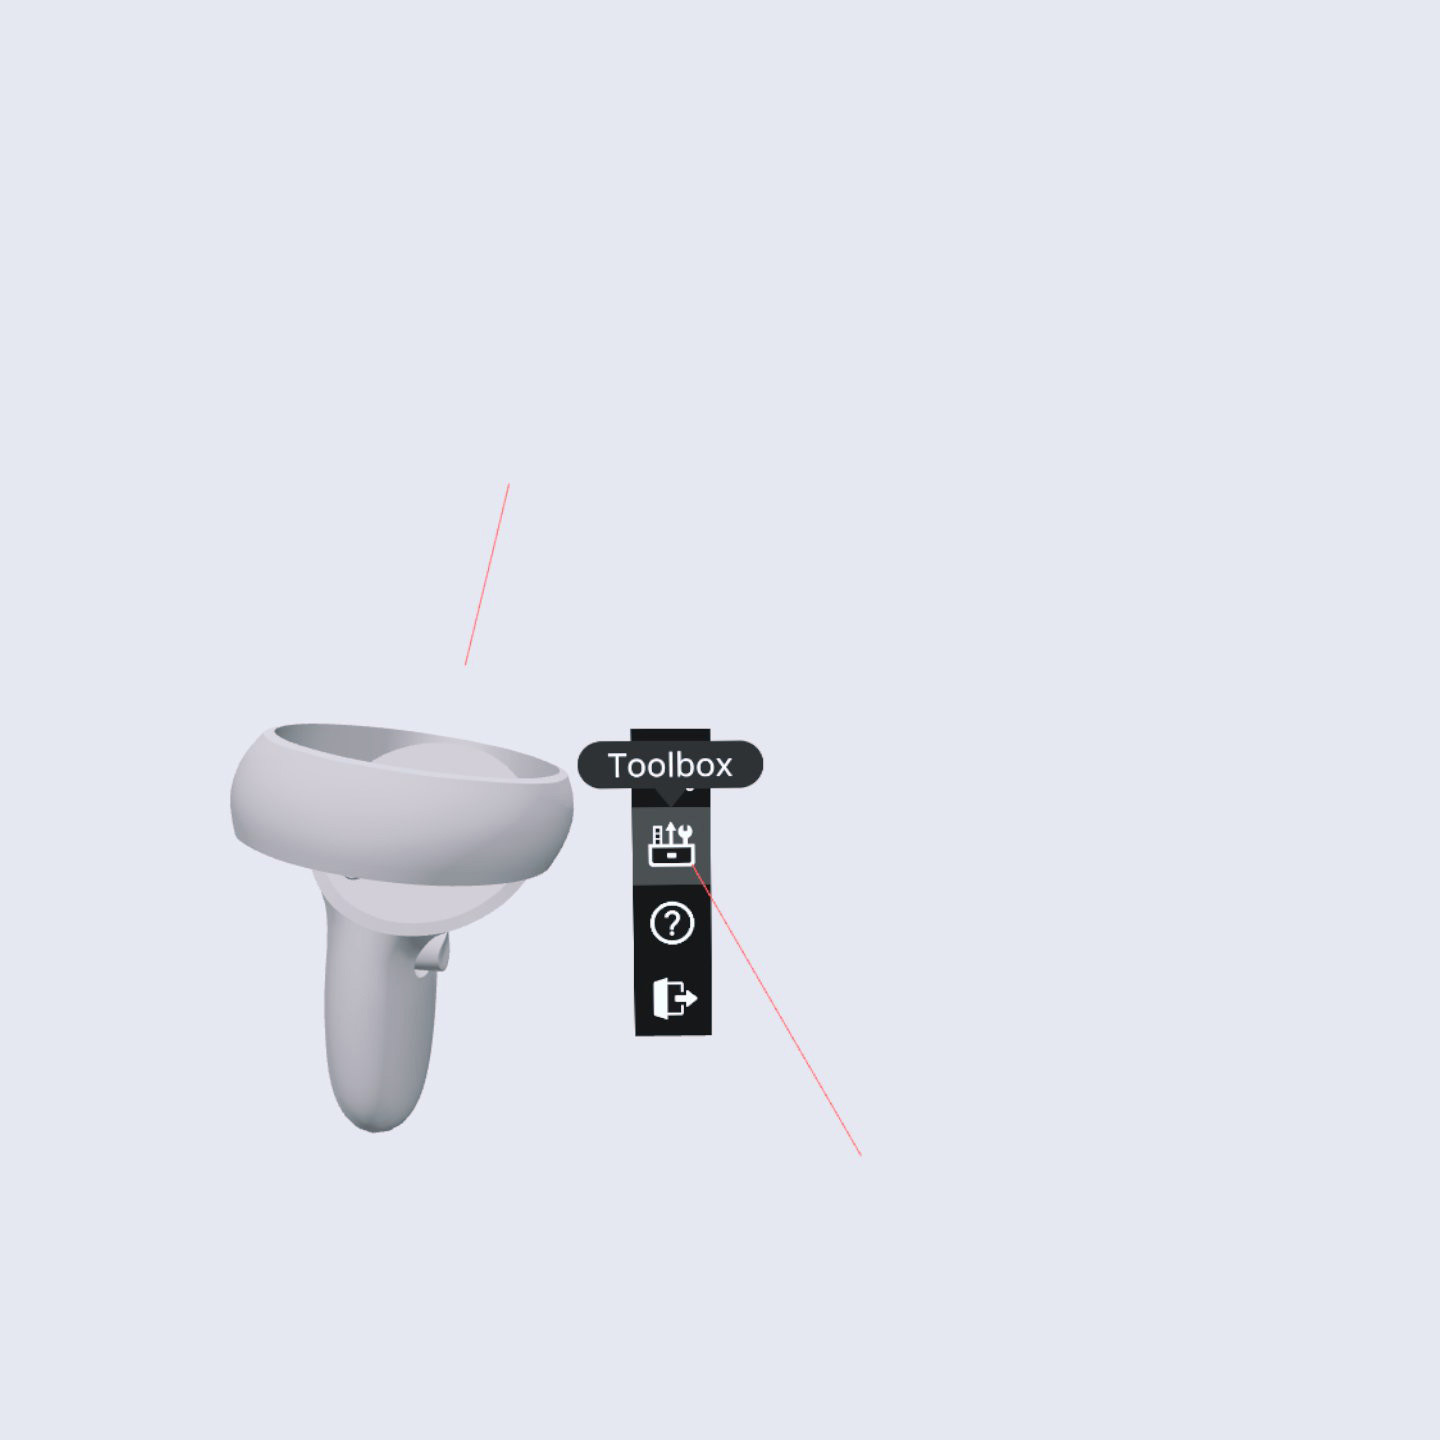
Implemented Menus, Tools and Tooltips
Once we successfully validated all the design changes, it was finally time to develop and implement the immersive UI in the Reach platform.
I actively participated in this phase and supported the developers by editing their code to create and style all the WebXR UI elements. This way, they could entirely focus on developing features and fixing bugs, which made it possible for us to ship the WebXR UI in a much shorter time.
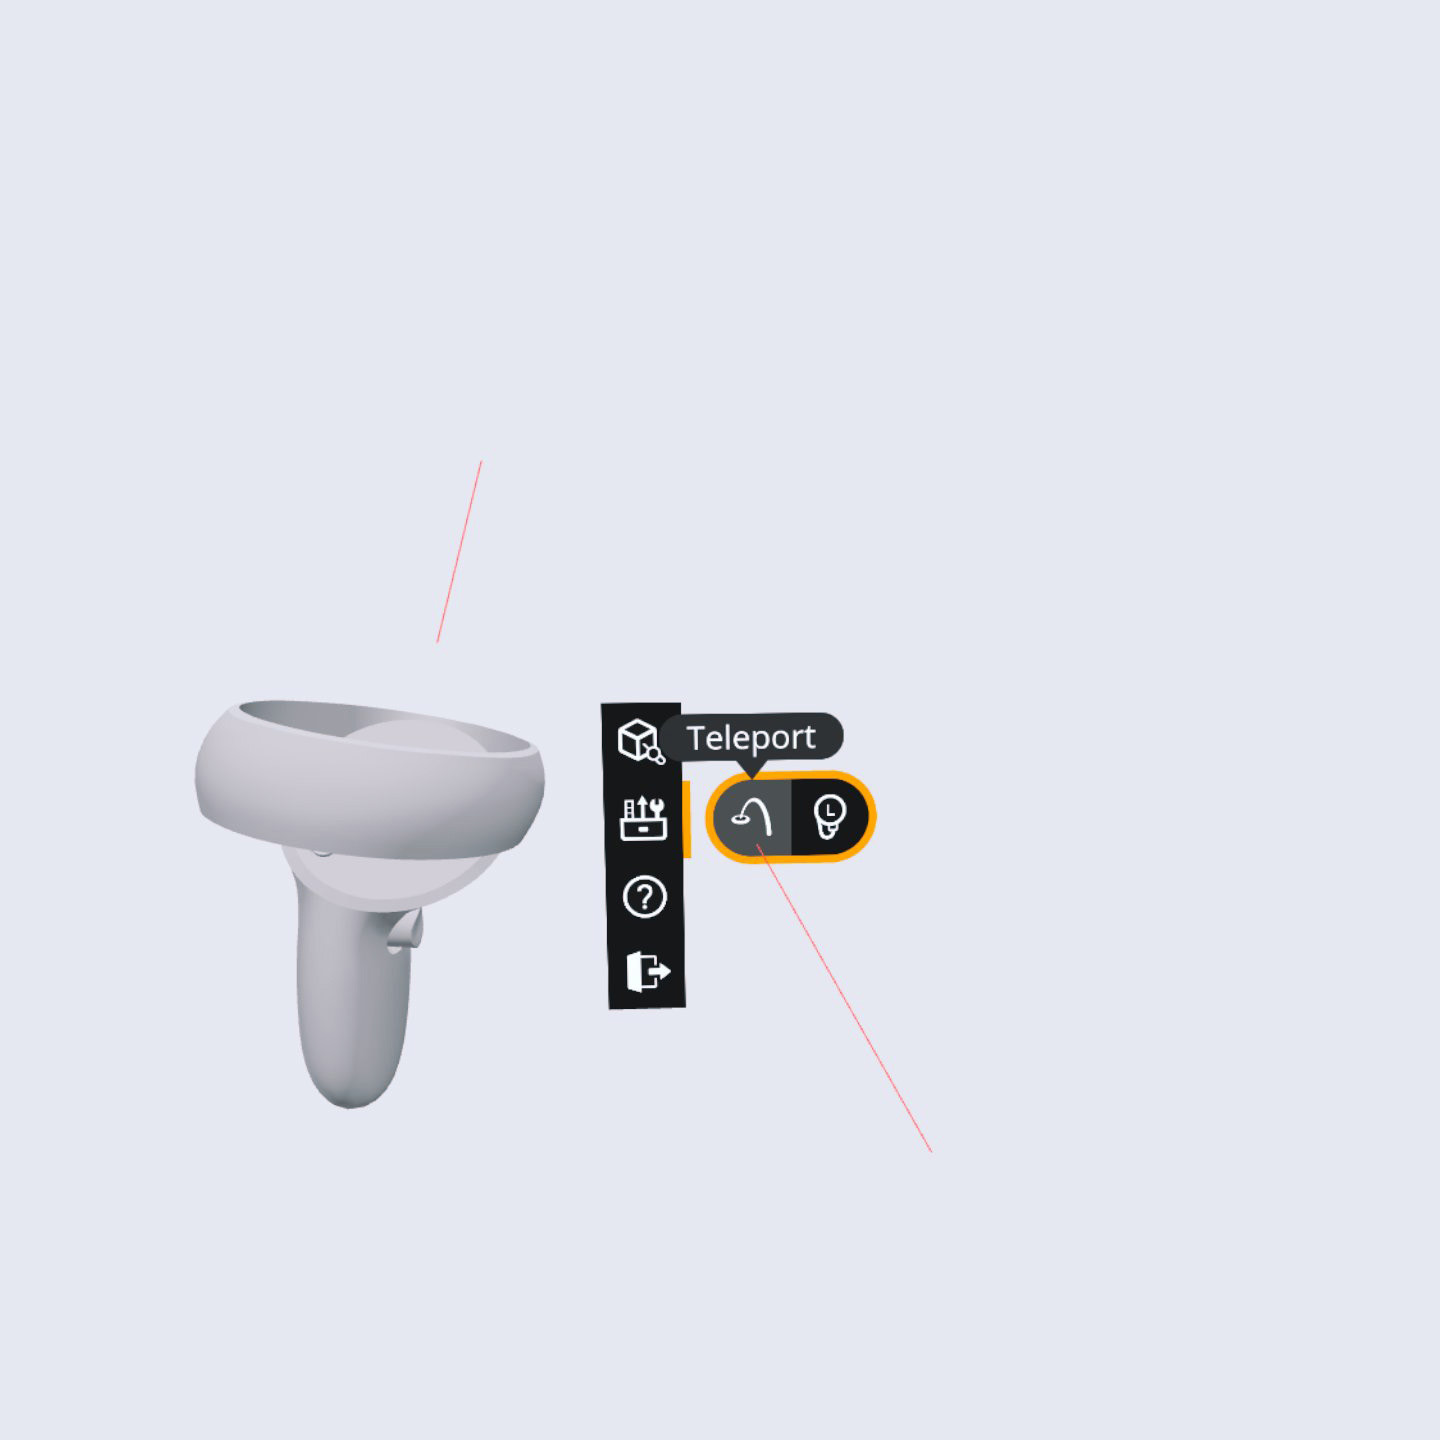
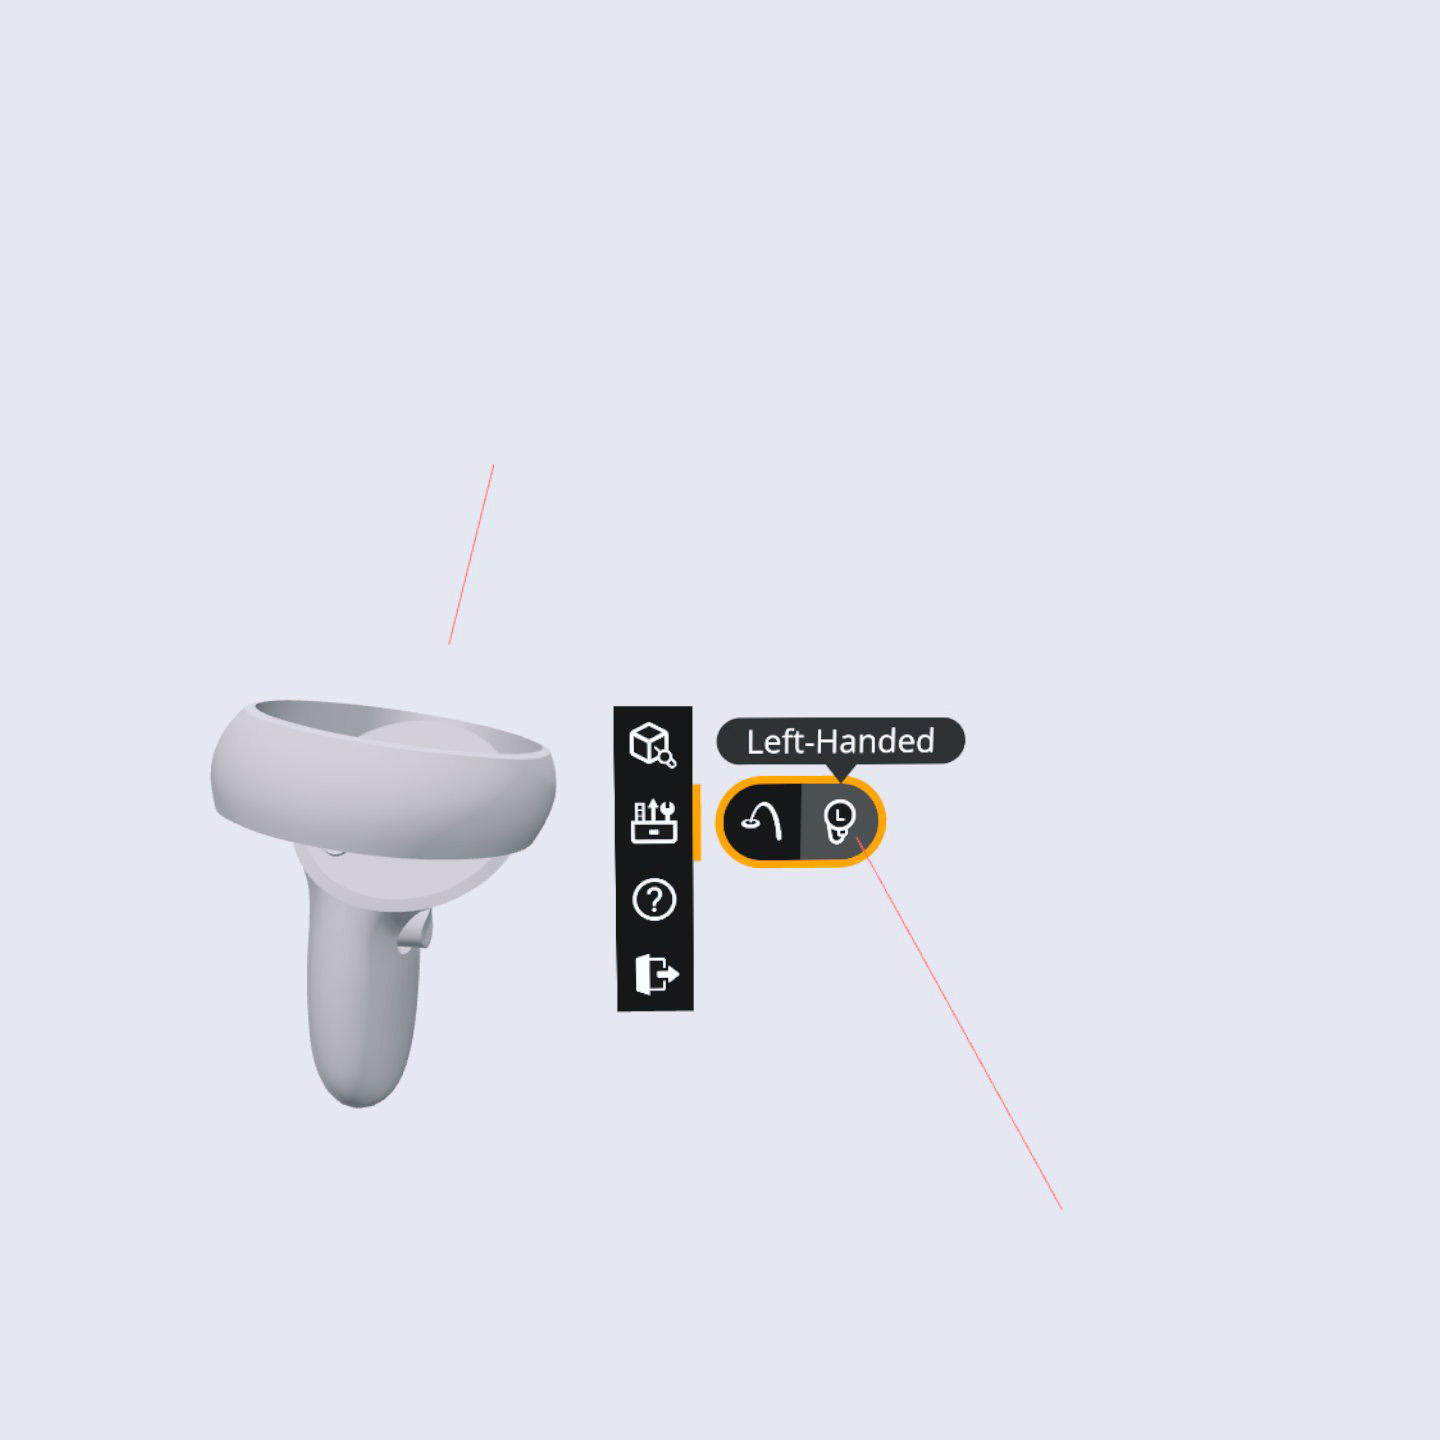
The images below show the implemented mode menus, their tools, and their respective tooltips.
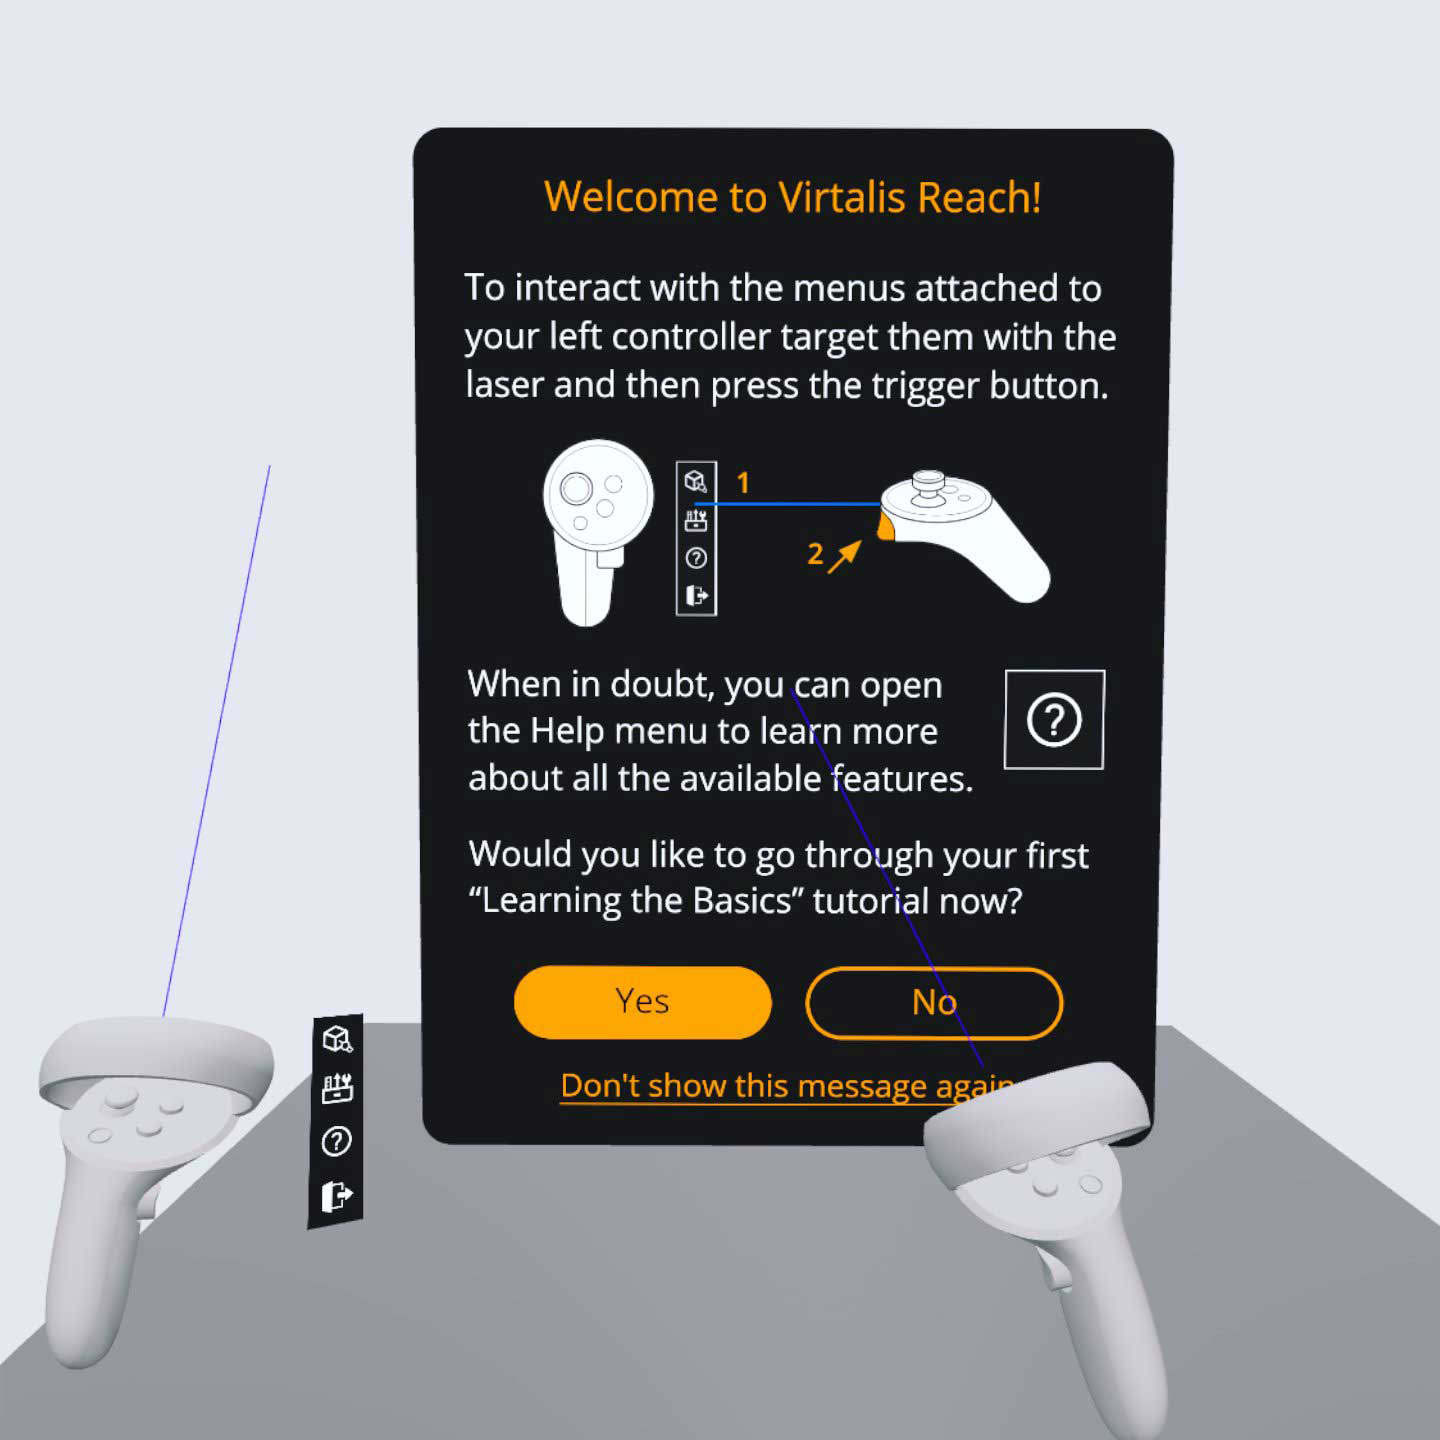
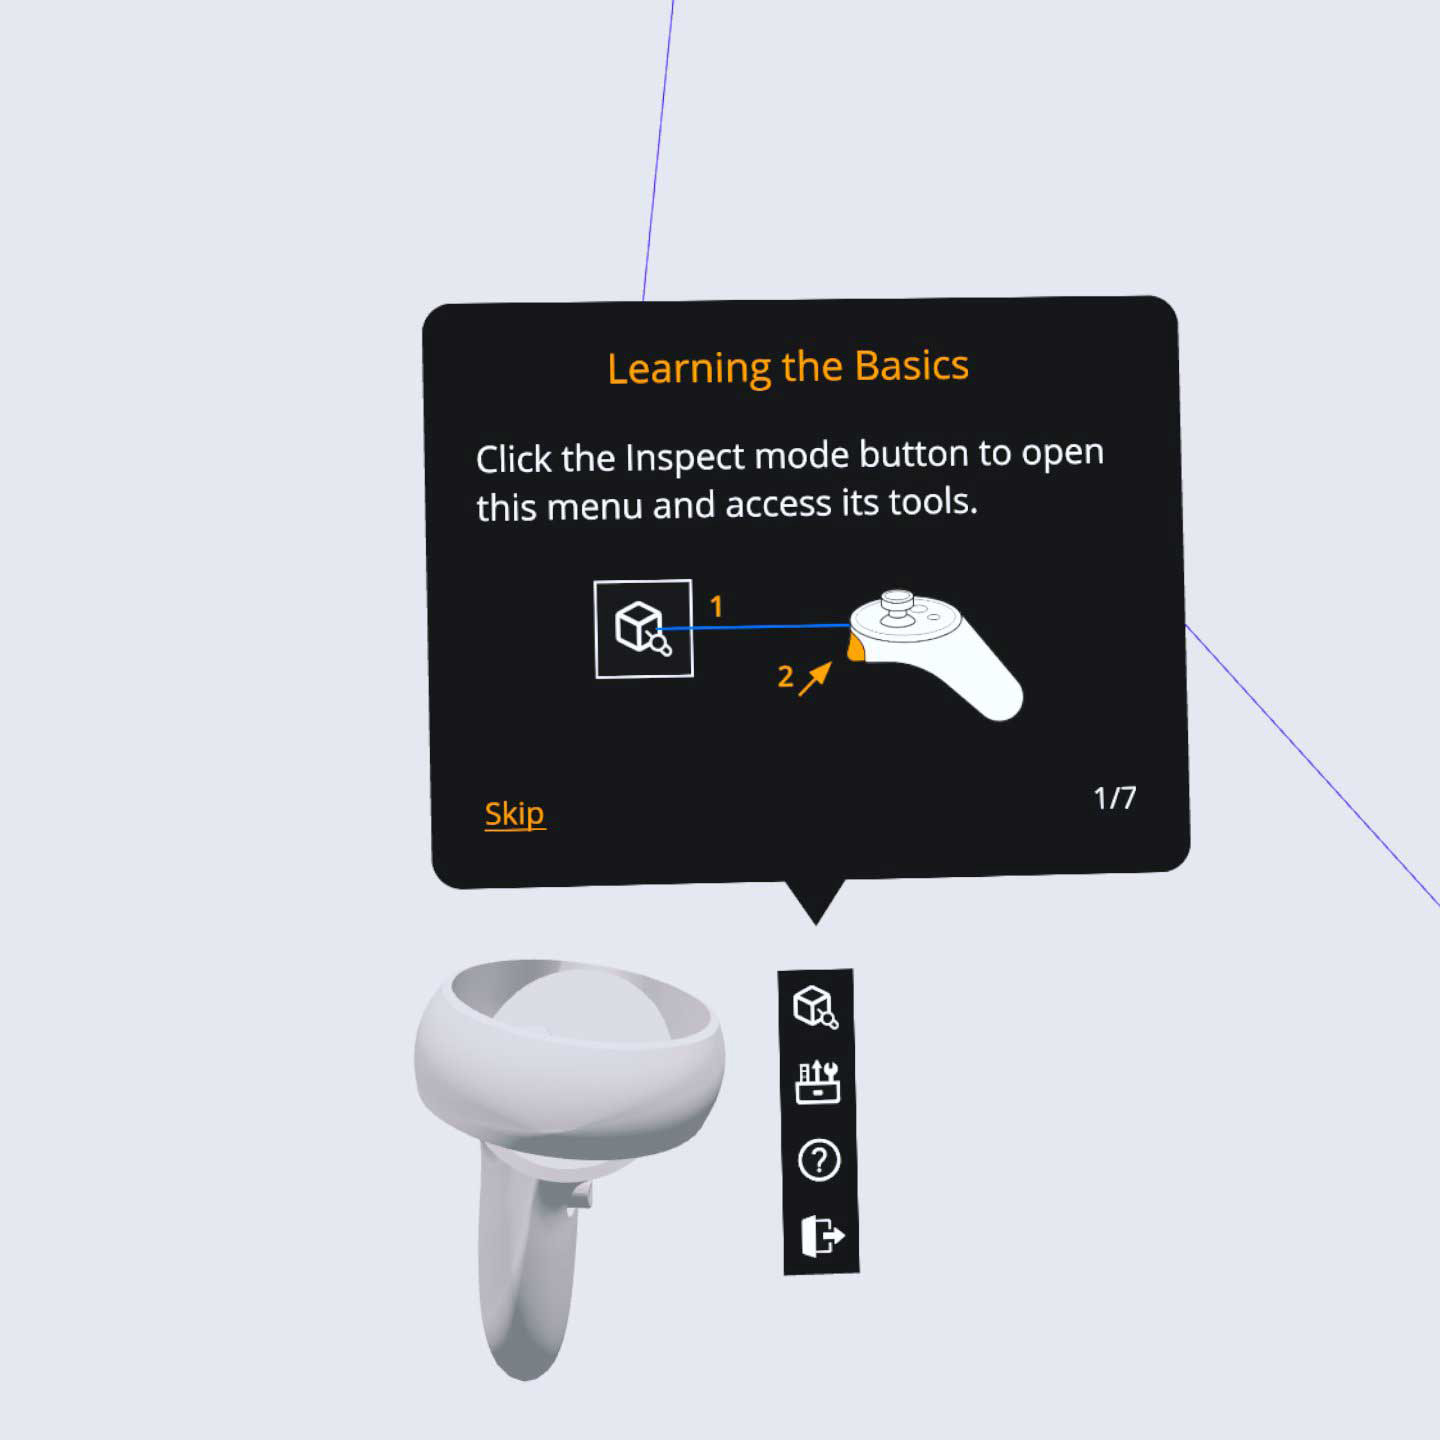
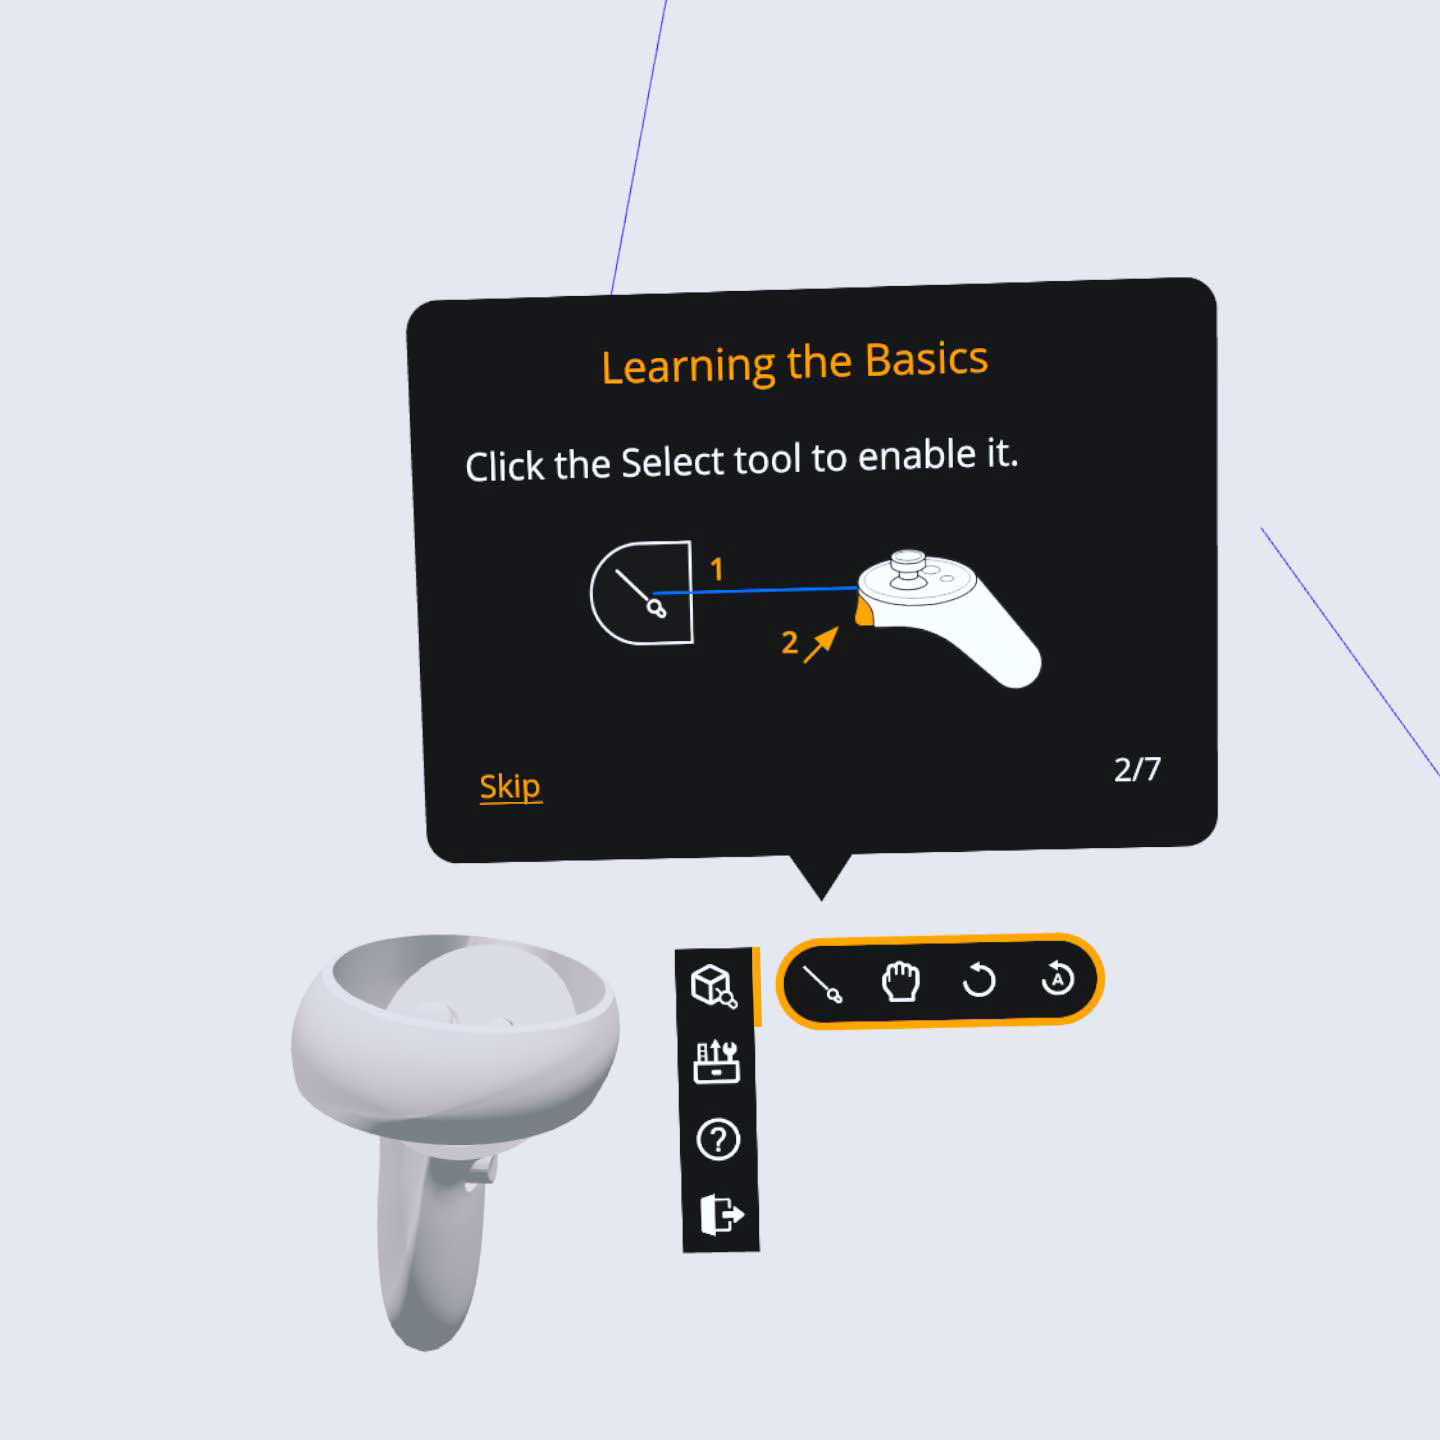
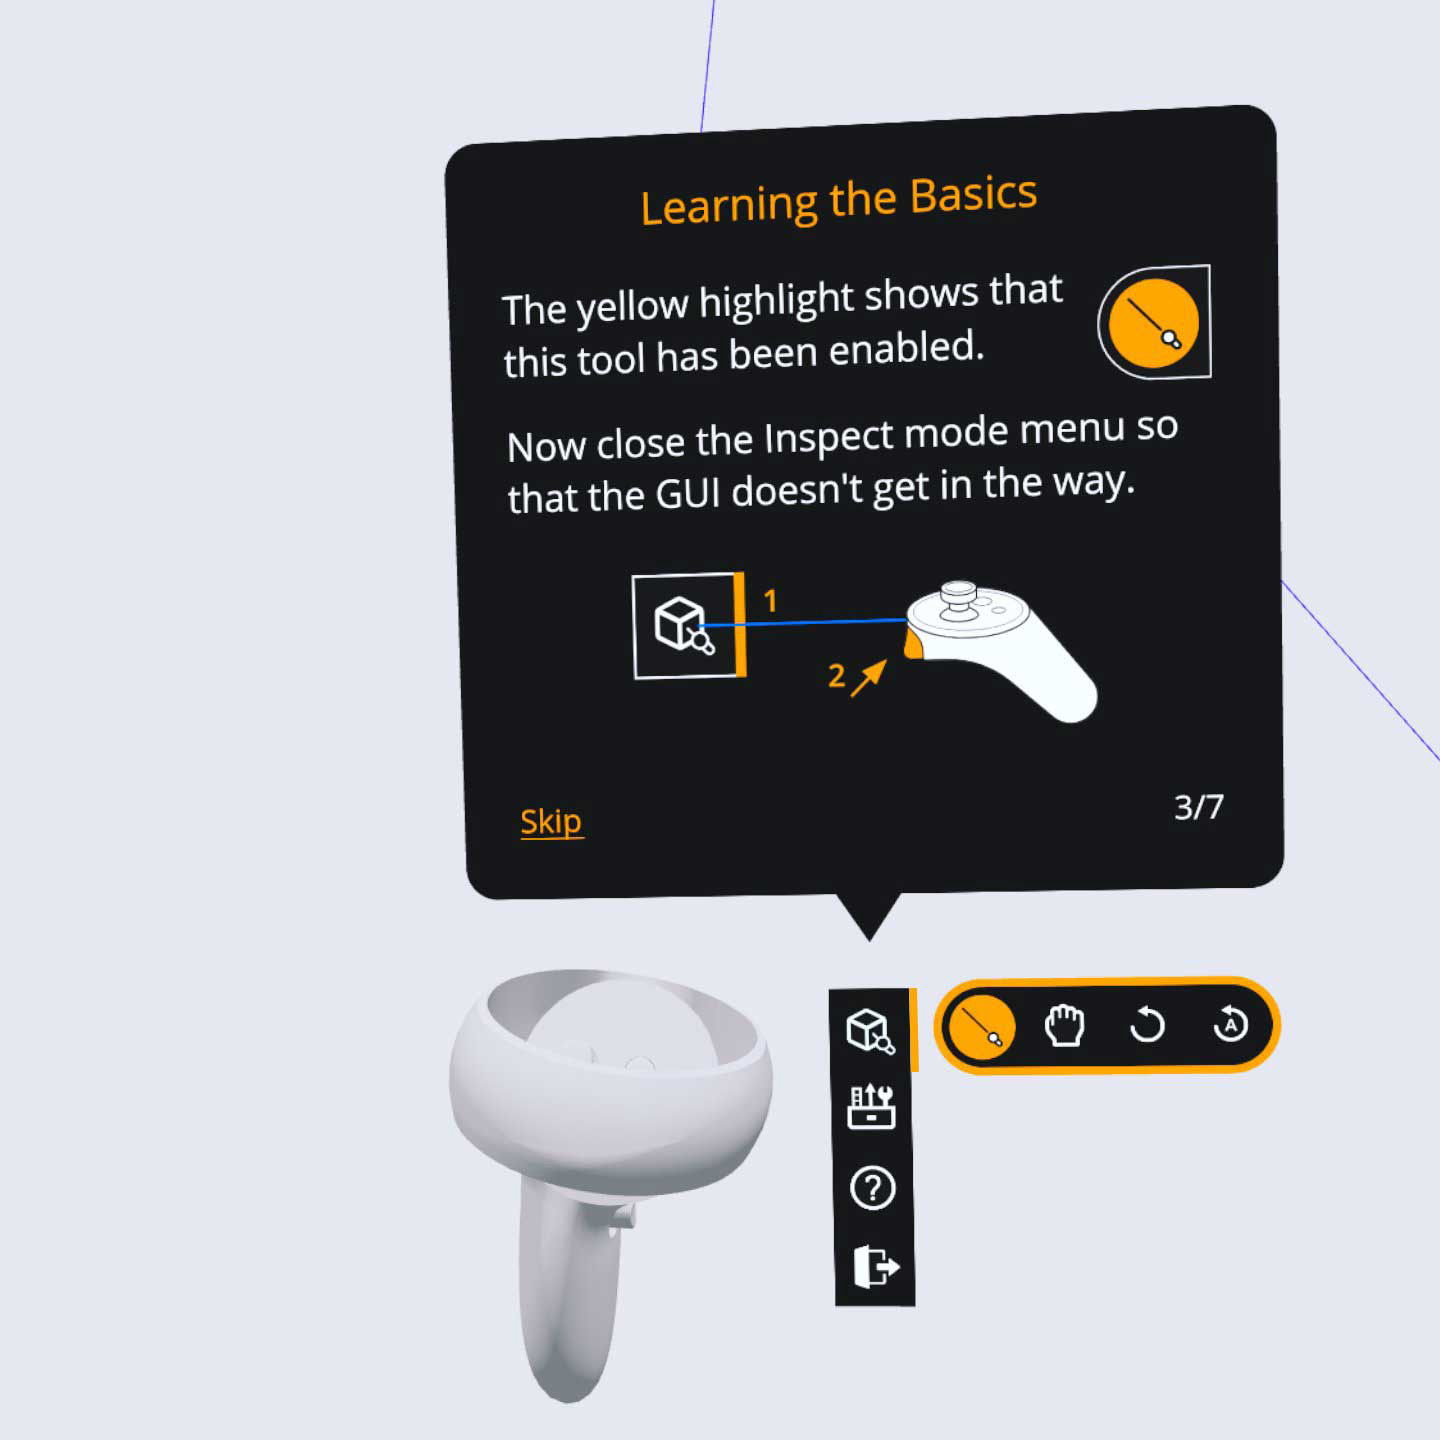
Implemented Onboarding Sequence
The images below show the implemented standalone onboarding panel and the 7-step onboarding sequence.
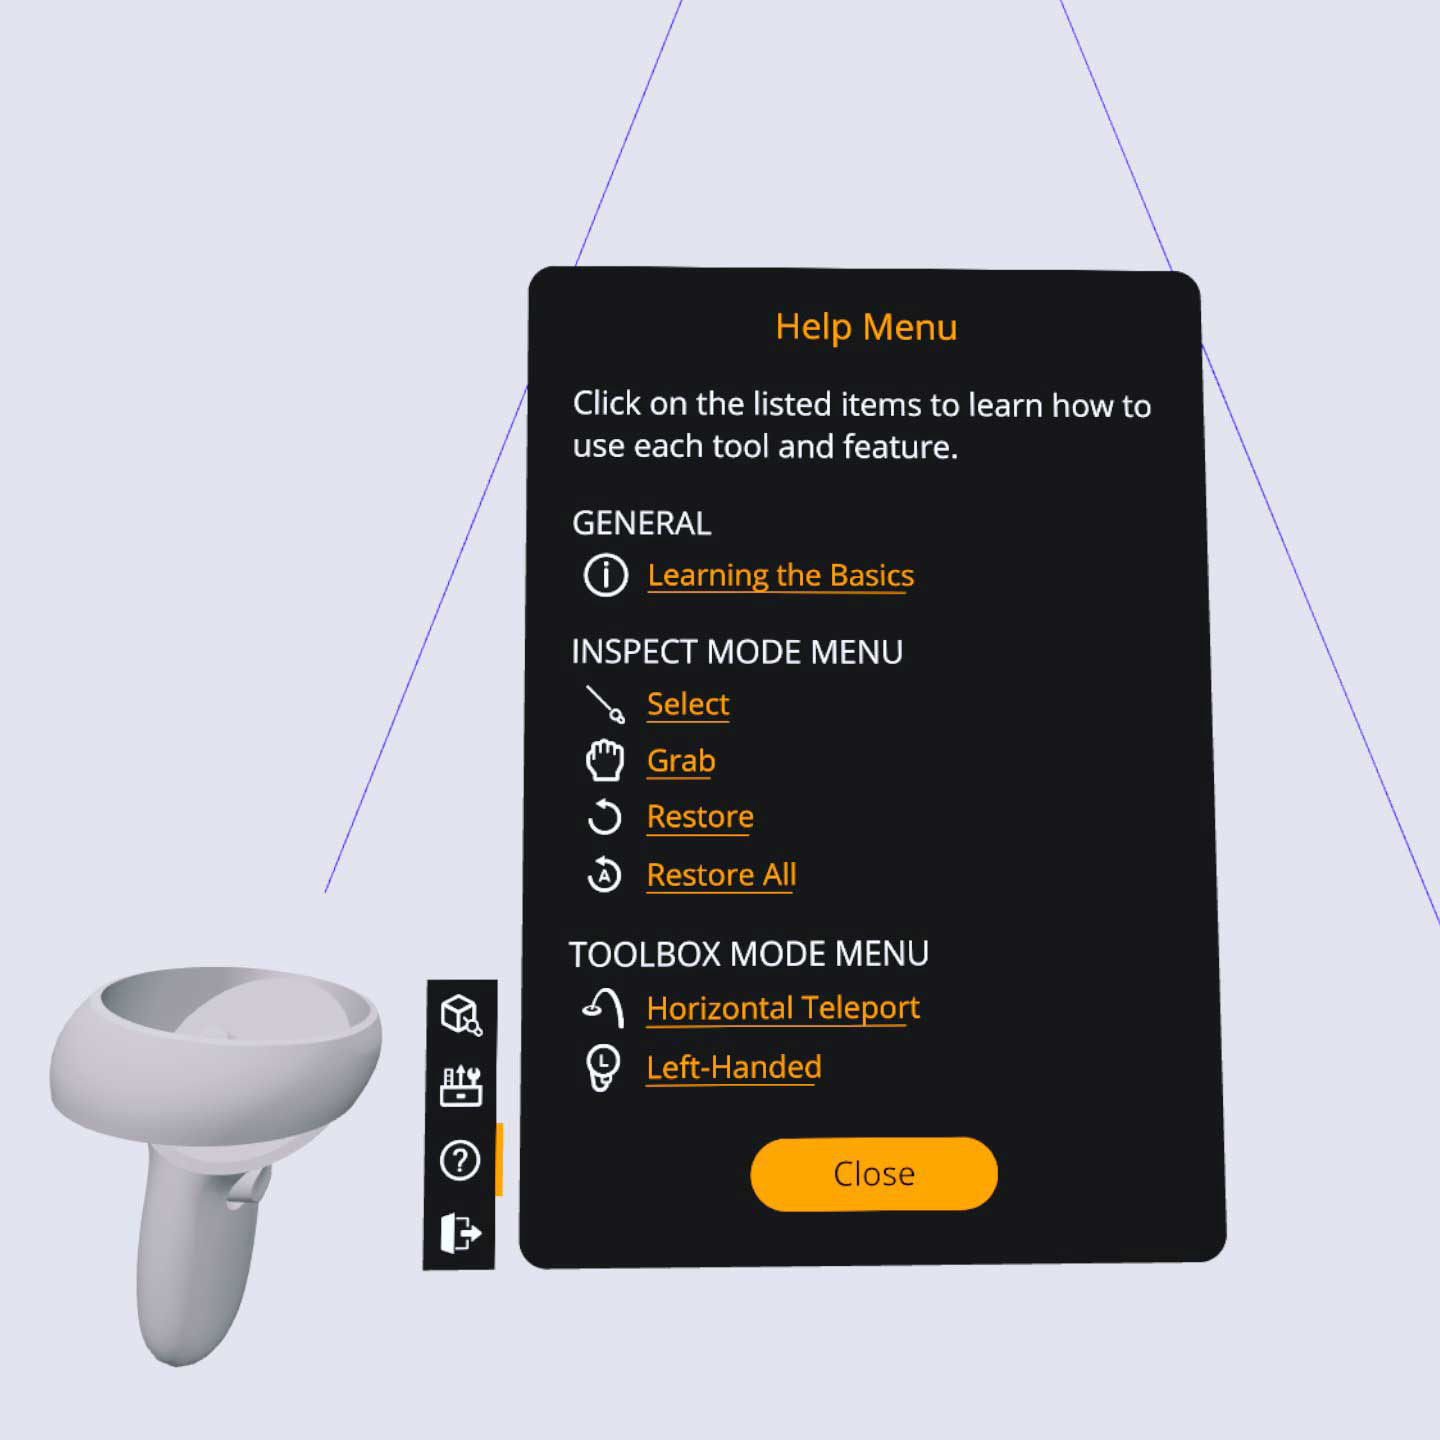
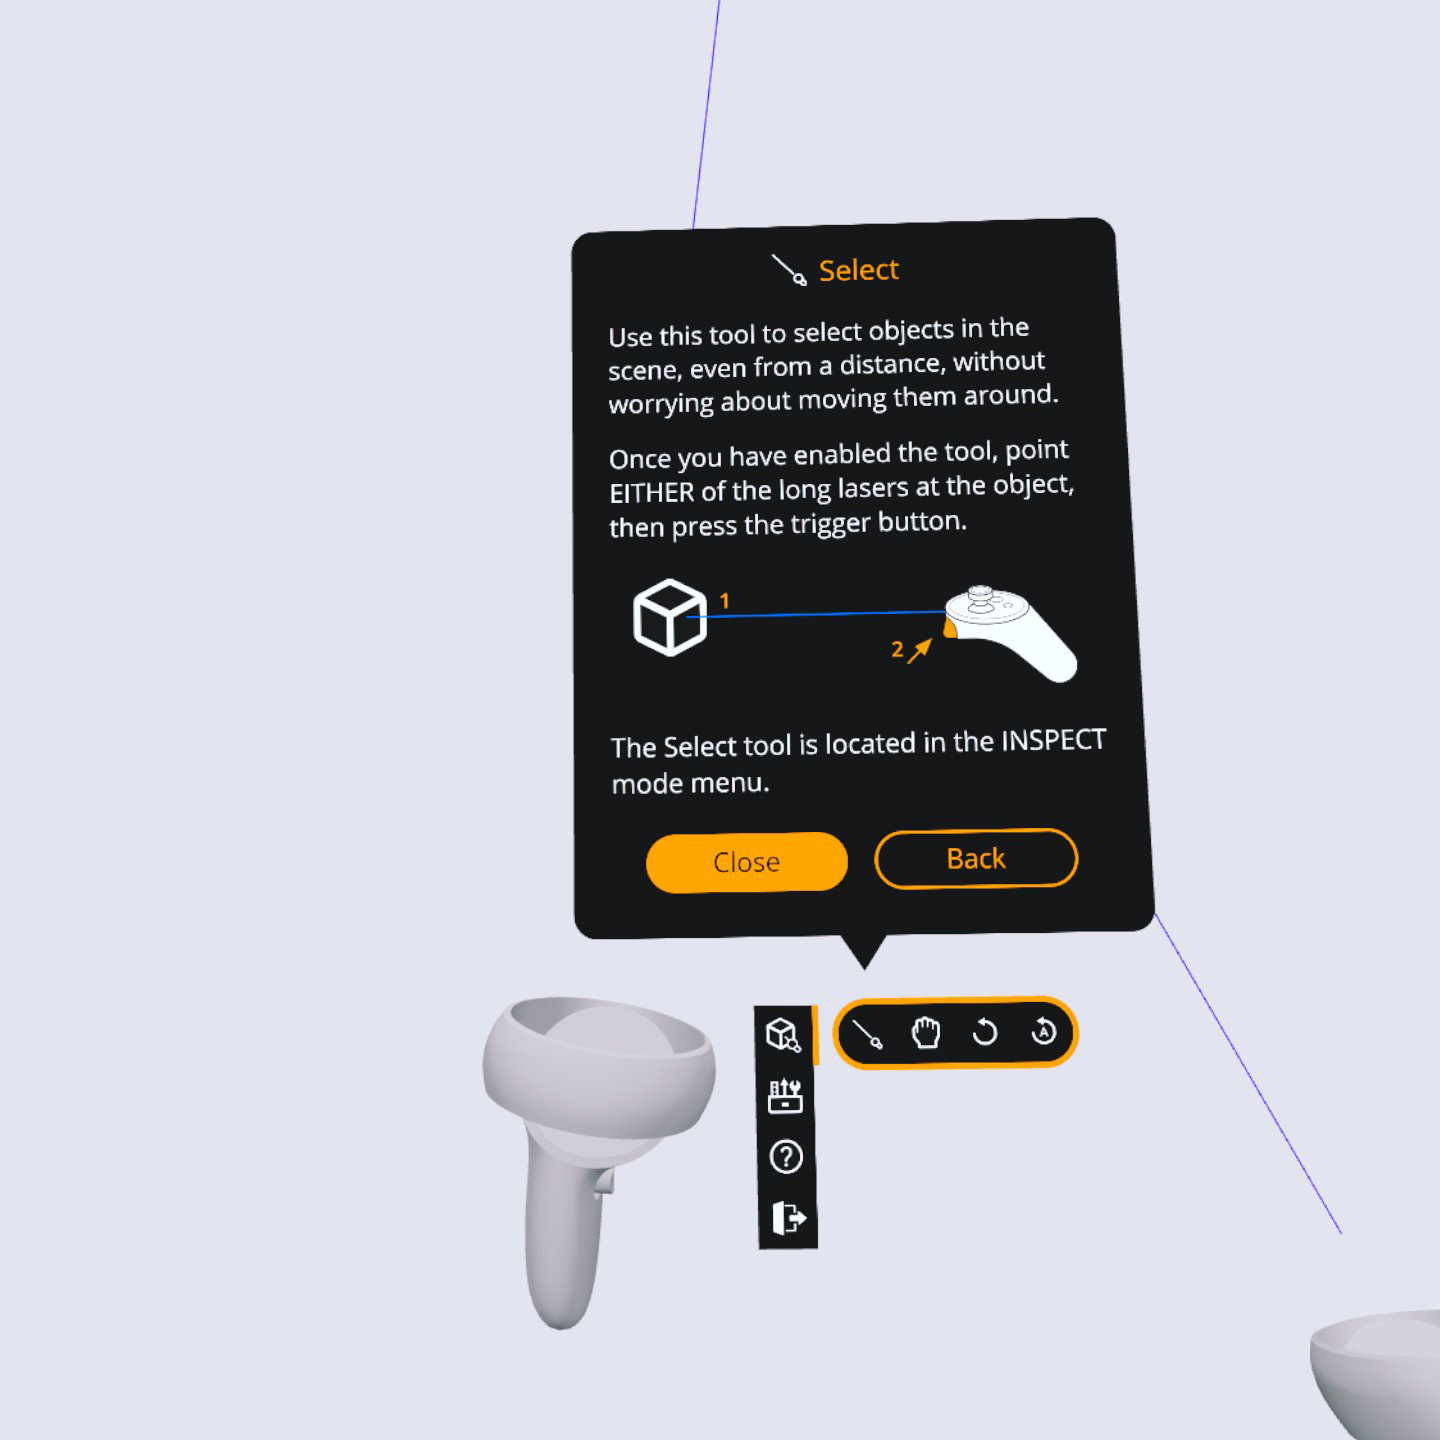
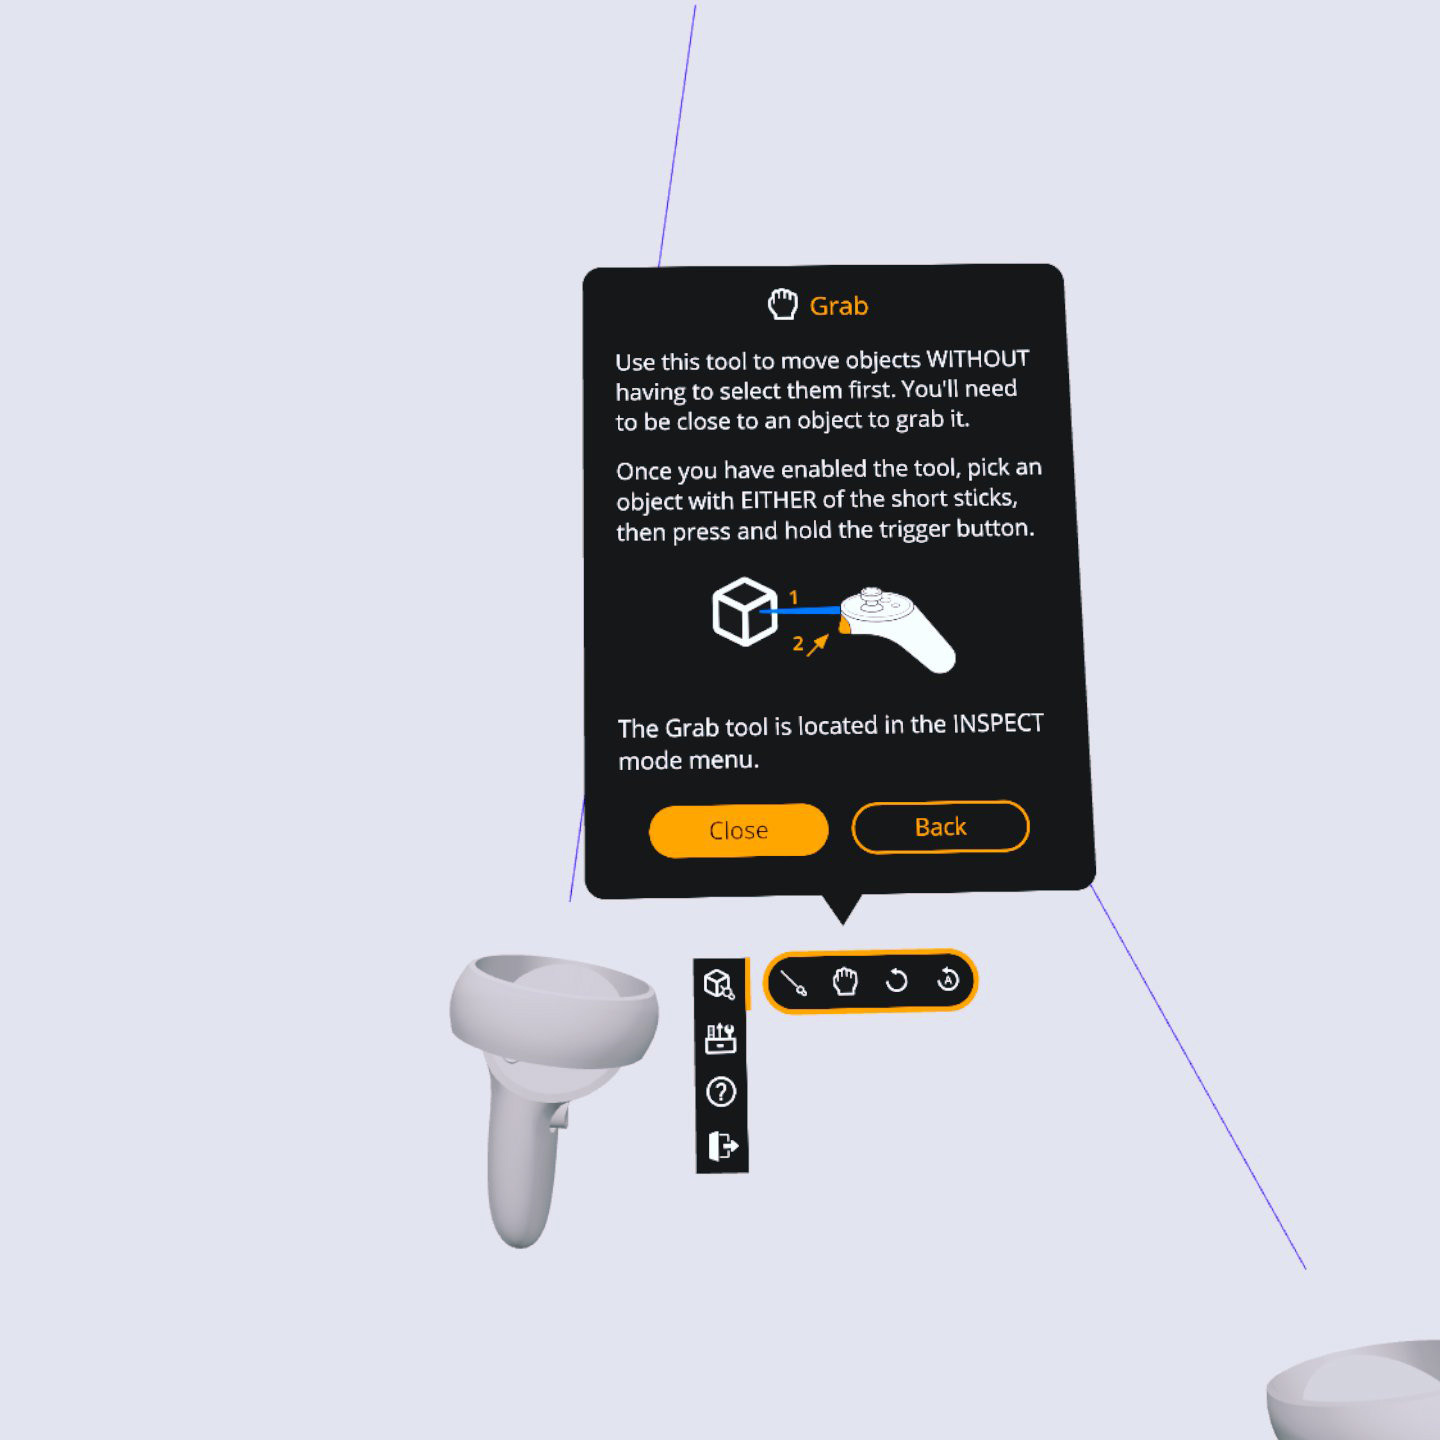
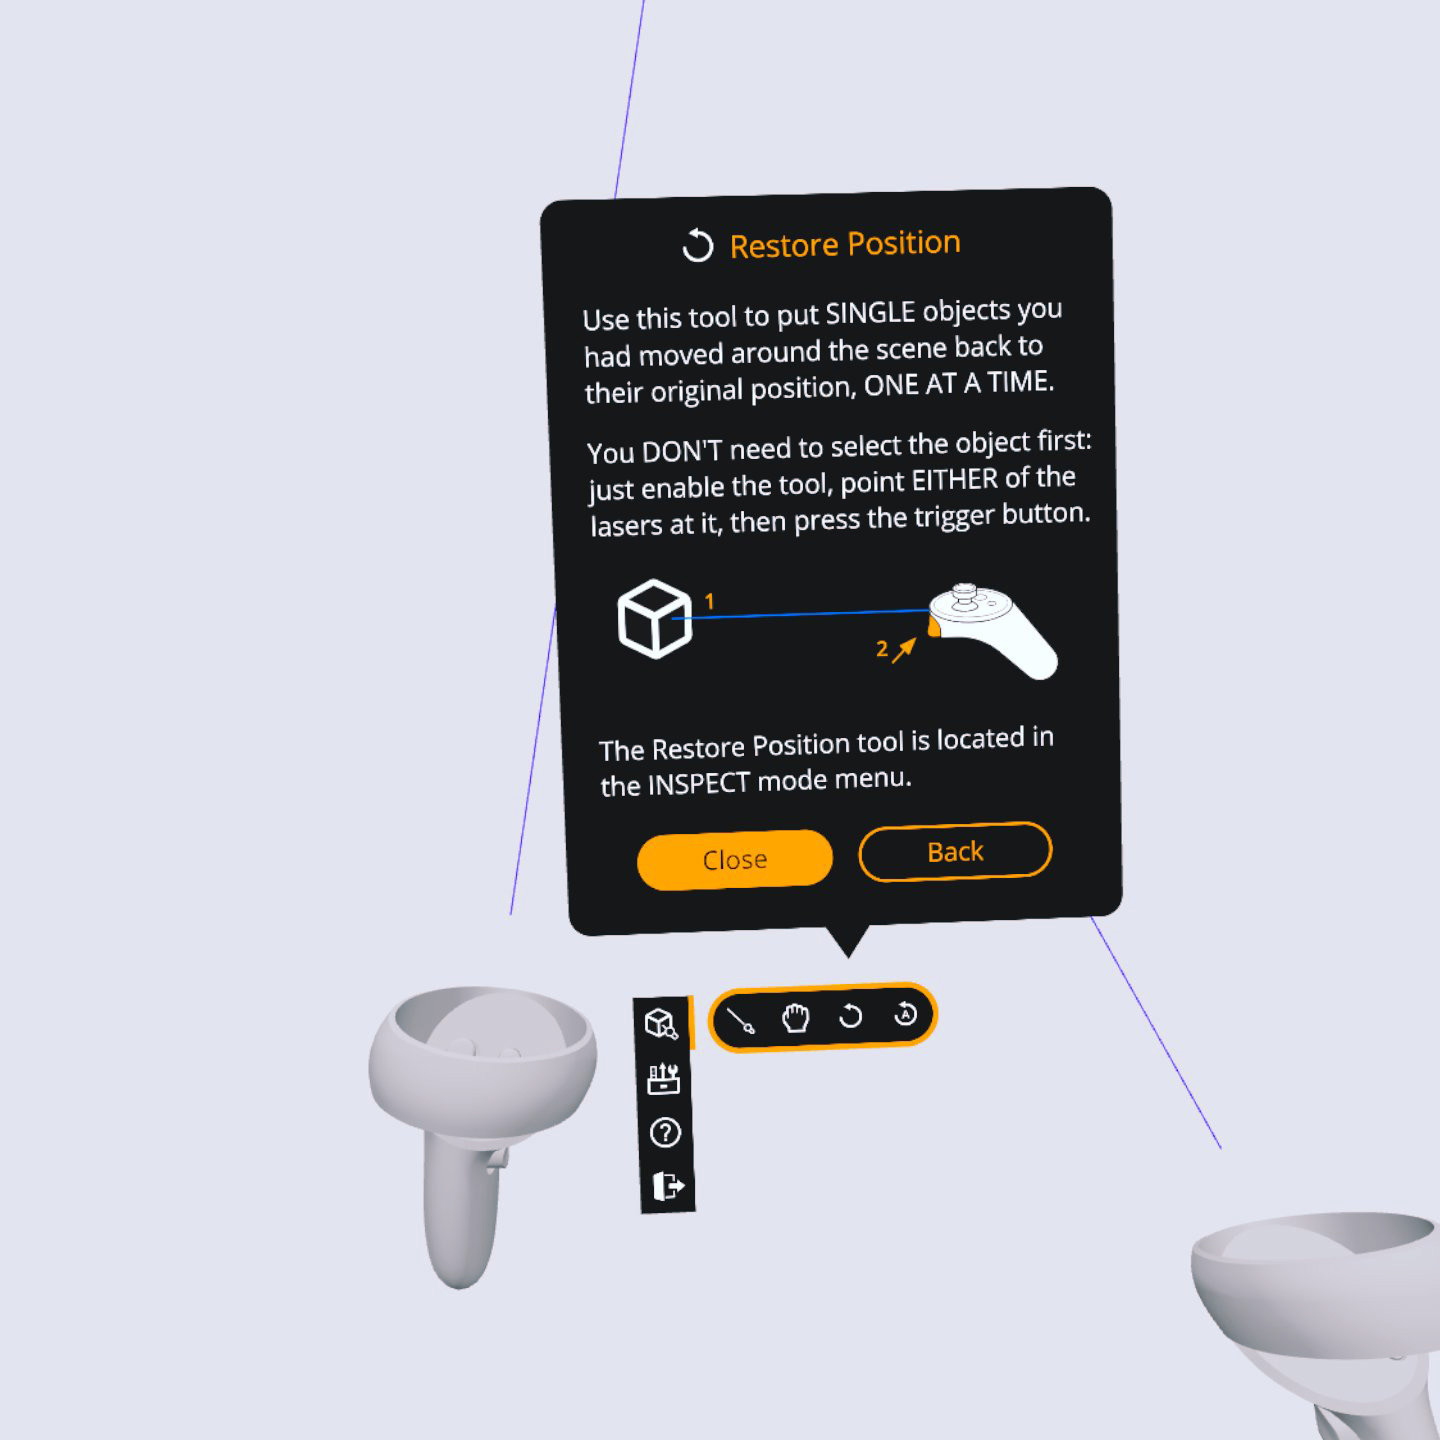
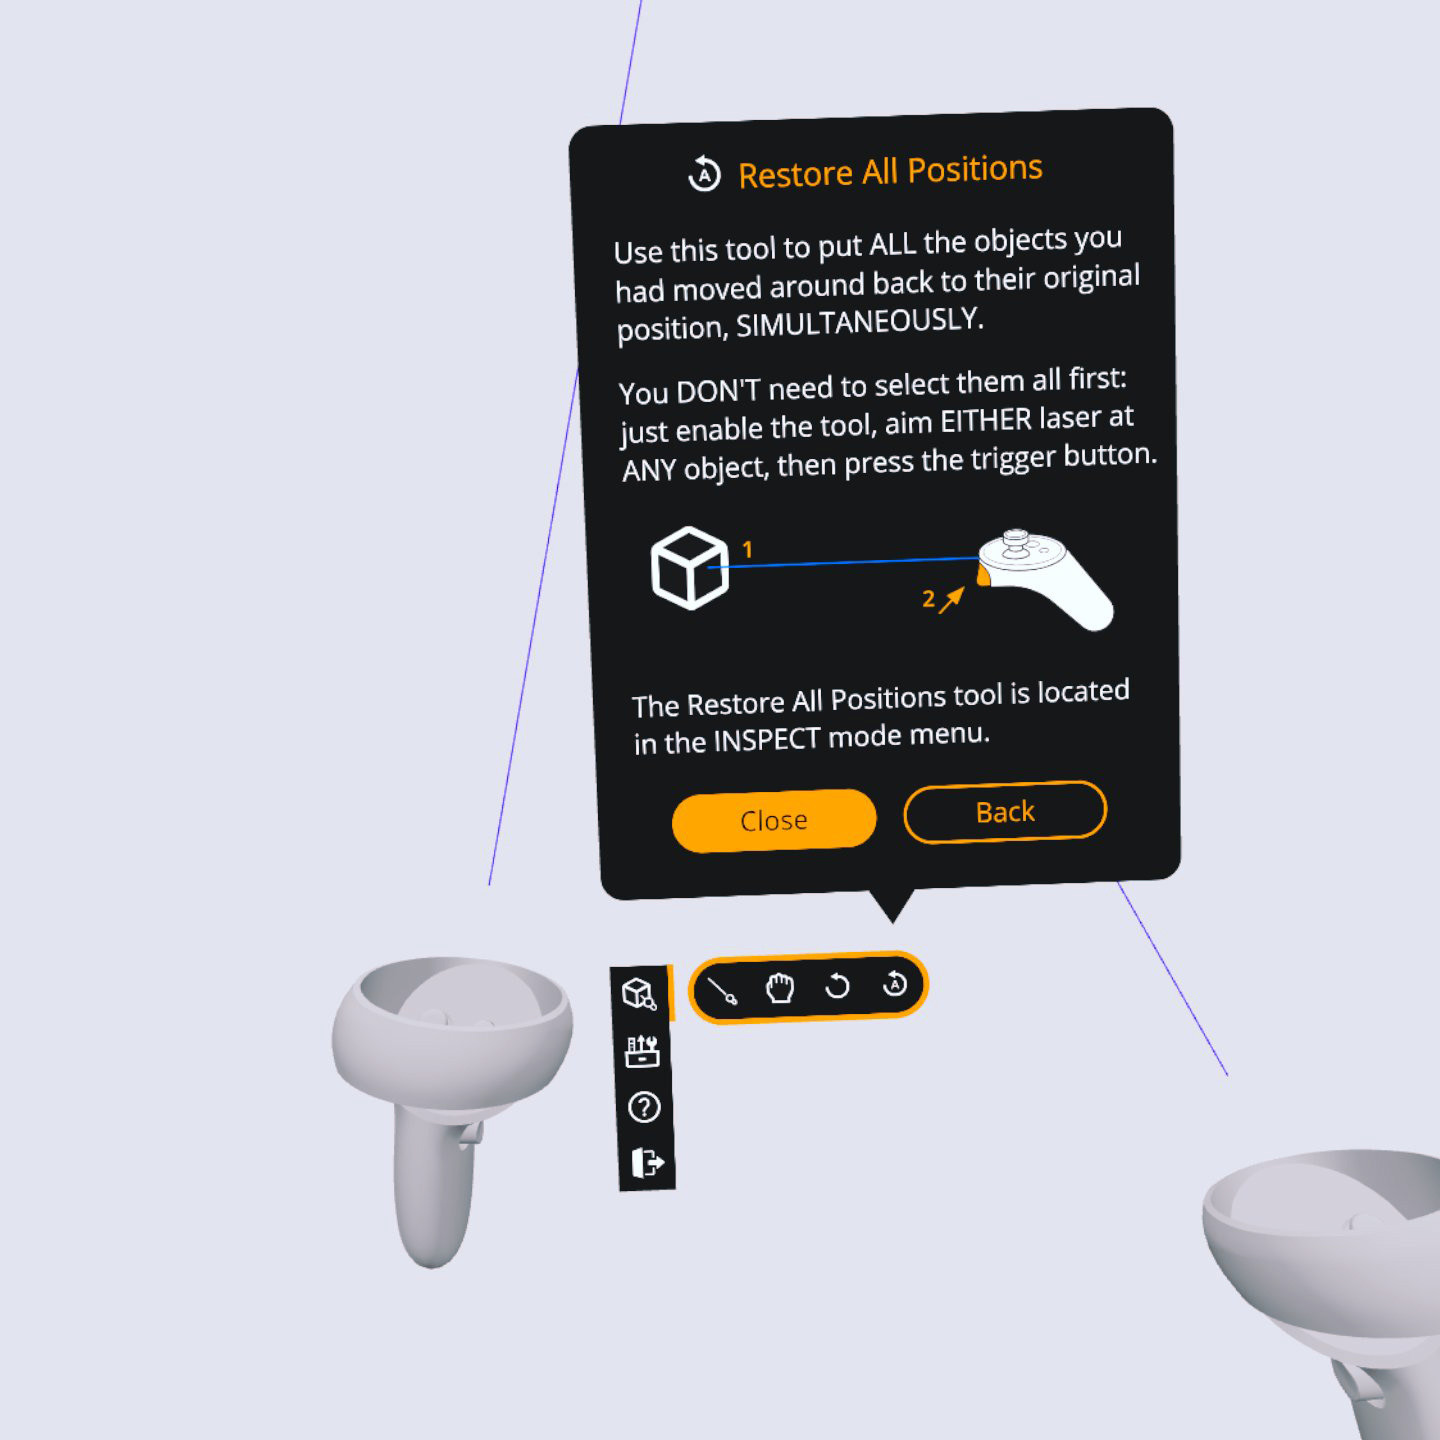
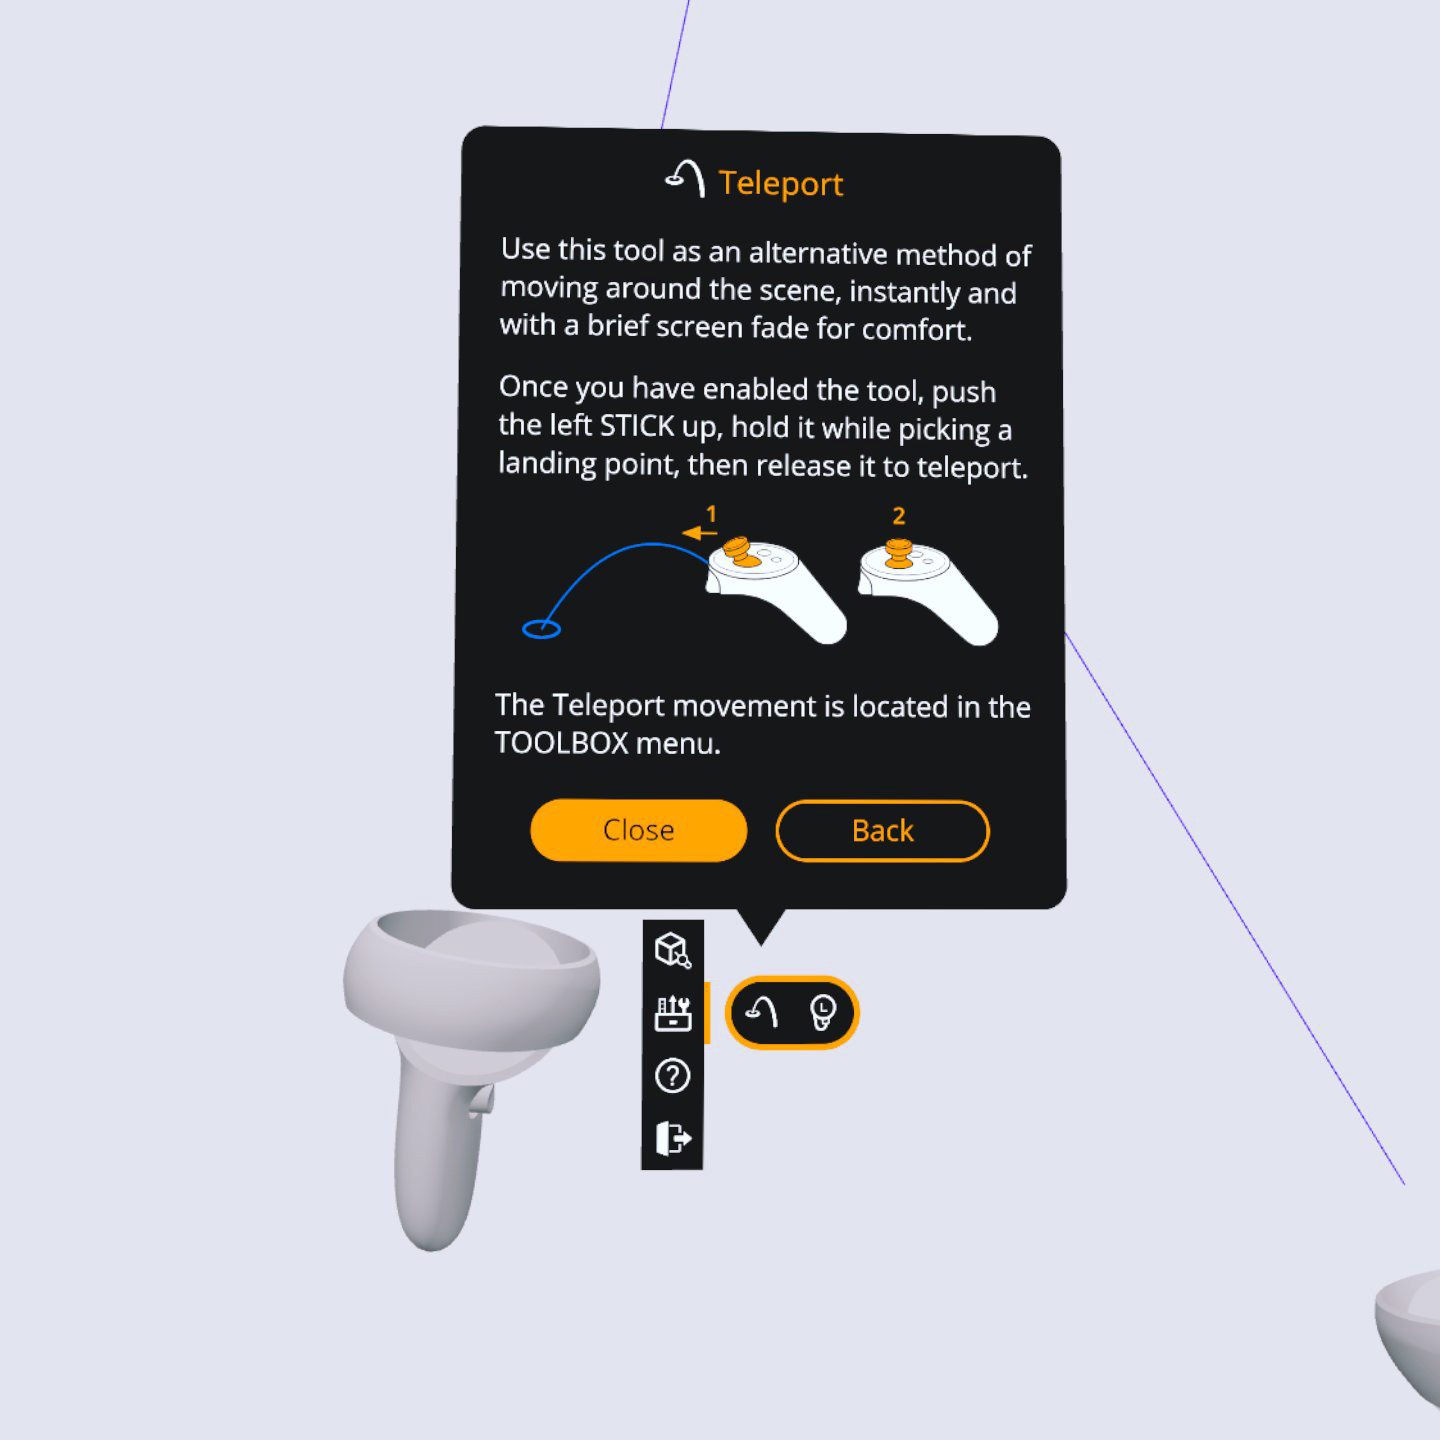
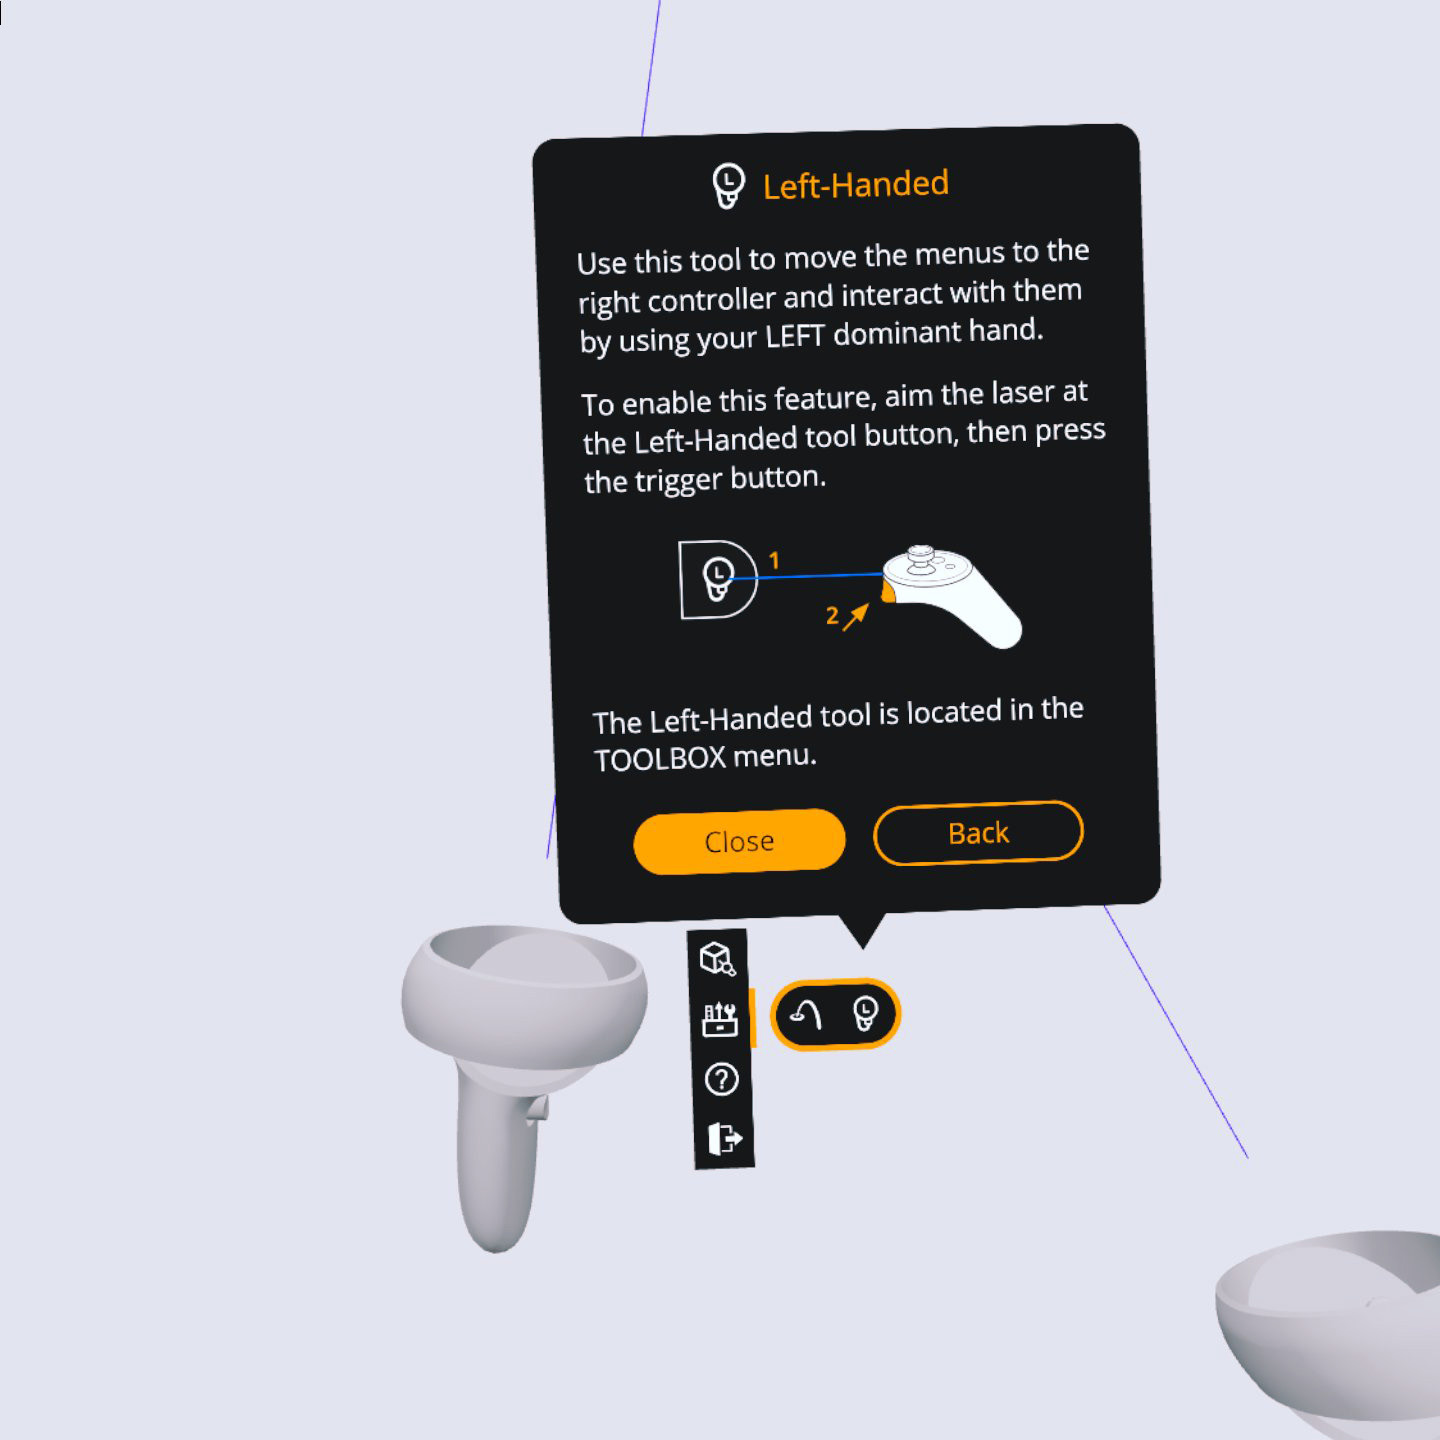
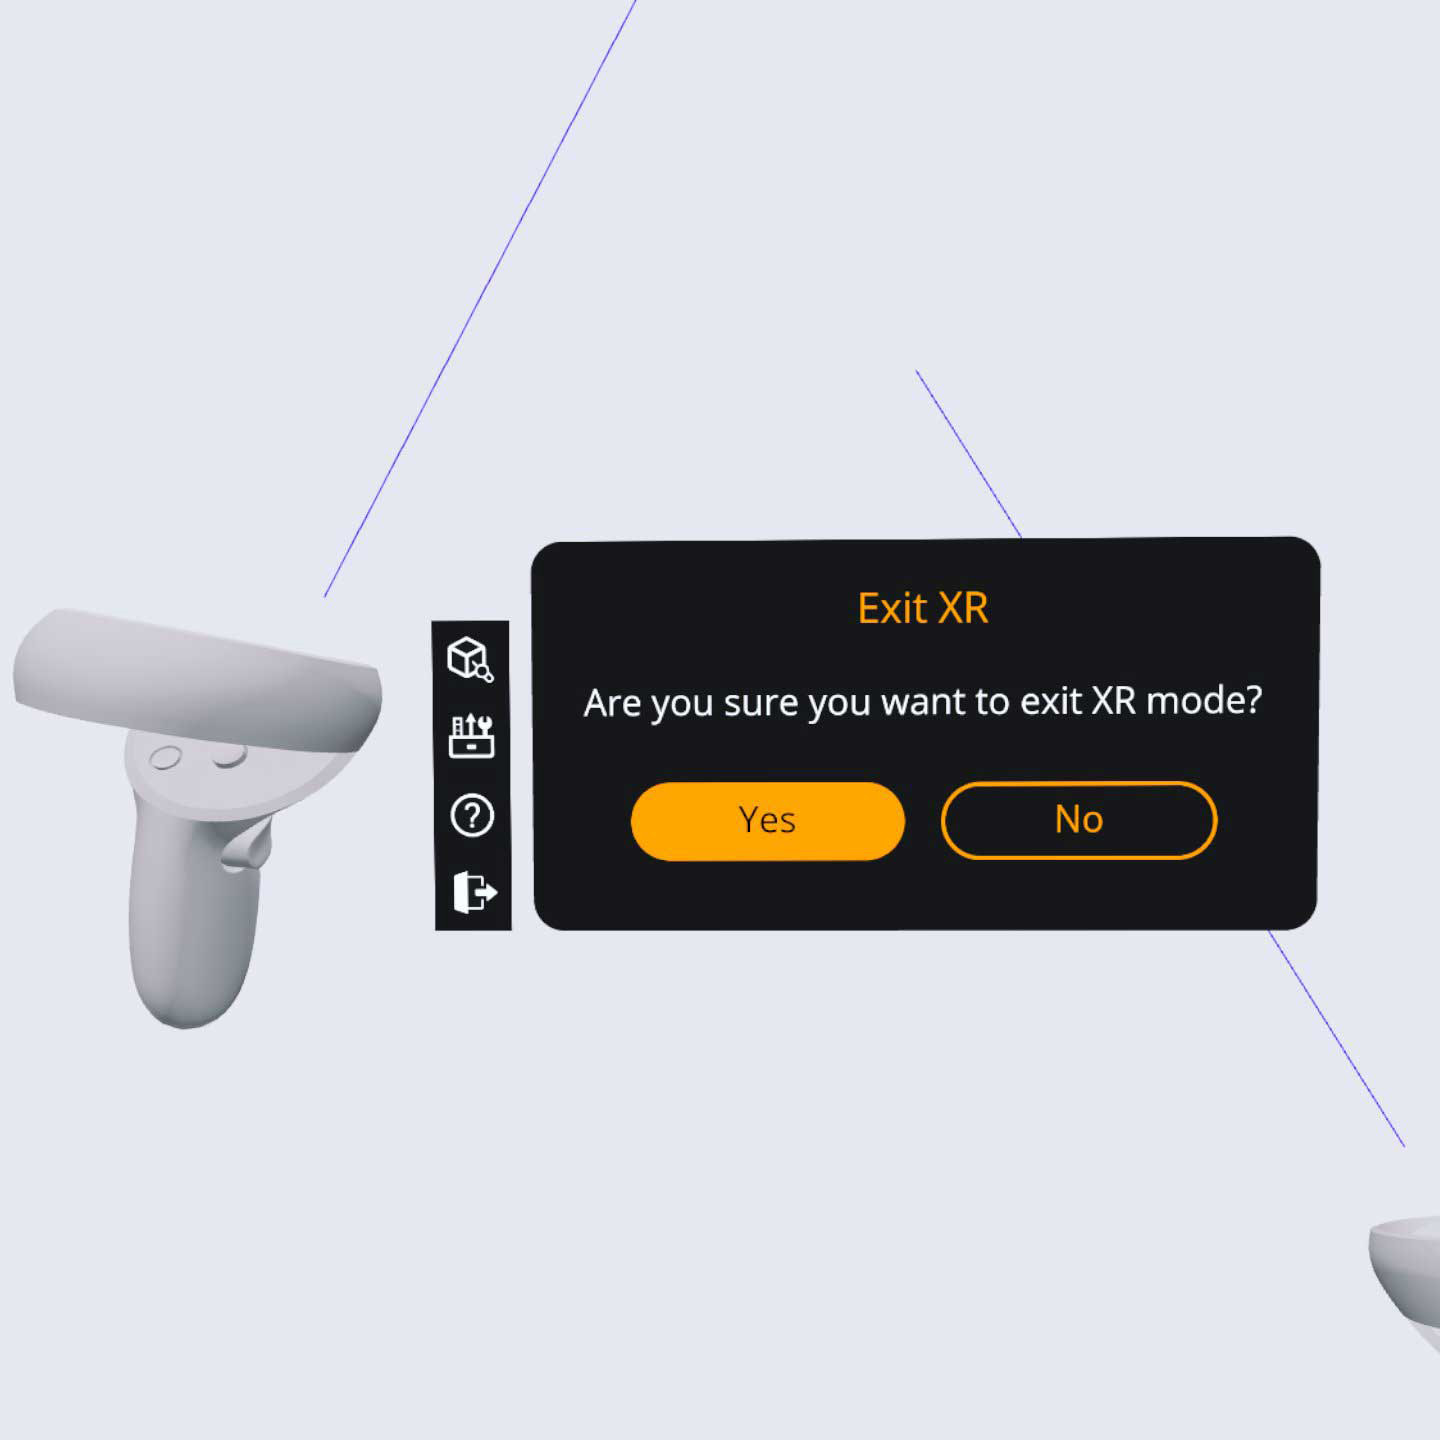
Implemented Help Menu, Tutorials and Exit XR
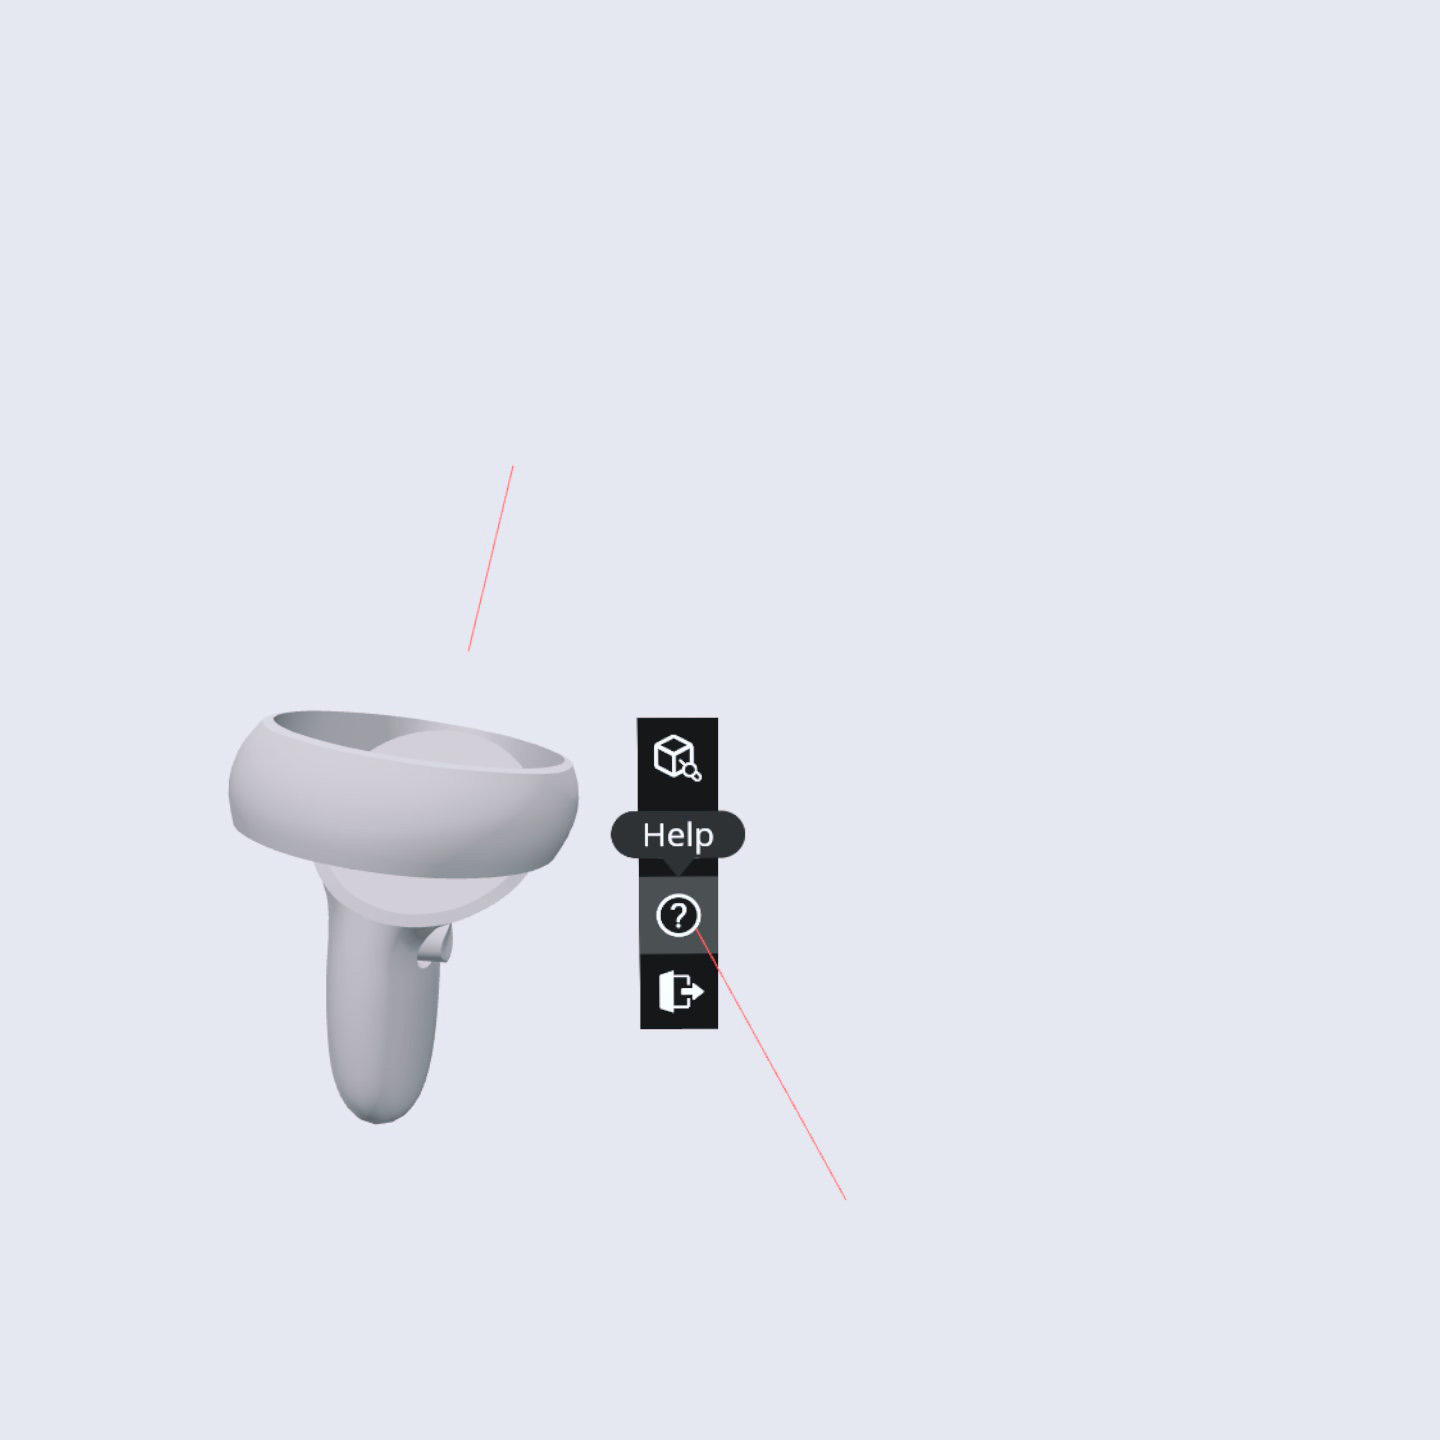
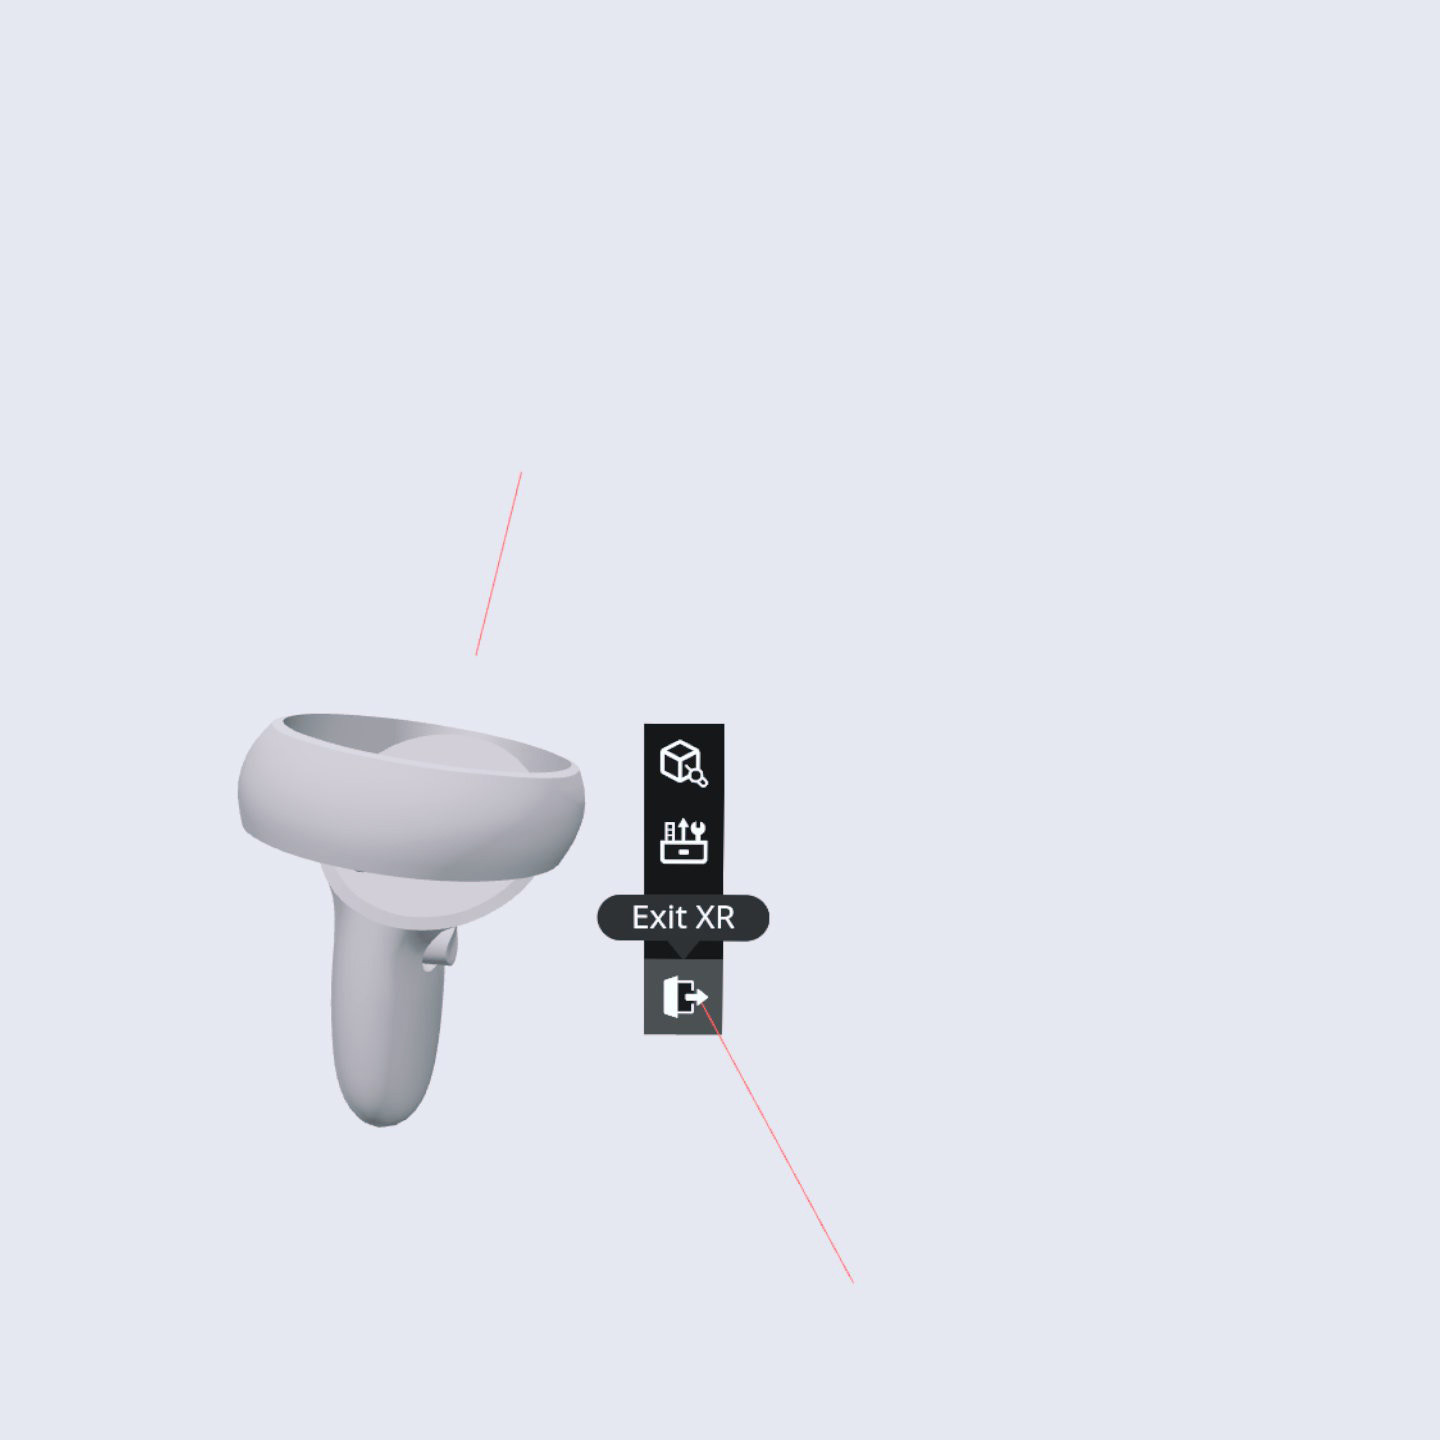
The images below show the implemented HELP menu, the mini tutorials and the EXIT XT panel.
Implemented Animated Highlight
The demo video below shows the implemented animated highlight, which is displayed for:
- The onboarding sequence to guide the users through the process
- The tutorials in the HELP menu to indicate the location of each tool
Related Works
Check out more works for Virtalis: